Magoshare Data Recovery for Mac
The best Mac data recovery software to recover deleted, formatted or lost data.
Free Trialupdated on 2022-02-10 to How To
Using a webcam to conduct video chats or a teleconference is becoming a common occurrence in our everyday lives. However, if the Mac camera isn’t functioning, this may be a major hassle. Apps that utilize the camera, including FaceTime, Photo Booth, Zoom, and Skype, are all at risk of this issue.
You can fix the camera not functioning in the mac problem, but first, you must investigate and identify the root cause. You could want to check your settings and connections since the external device doesn’t function either.
The FaceTime camera is not supported directly by the software that comes with MacBooks. Individual programs like Zoom or Skype configure WebCam’s features. As a result, there’s a good likelihood that these programs are interfering with regular streaming and resulting in the Mac Camera not functioning issue.
Was your MacBook recently damaged by a fall? Or did you accidentally throw it? It is essential that the camera is in perfect working order. It’s possible that this is the root of the problem with your camera. If it’s physically damaged, replace it right away or get it fixed as soon as you can.
Your WebCam may shut down automatically if your Wi-Fi is unreliable or you don’t have enough bandwidth. In order to save both electricity and Wi-Fi bandwidth, this is often done.
It’s conceivable that your Mac WebCam is being used by more than one program at the same time. You may not be able to turn it on for the application of your choice because of this. Close any apps using your WebCam, including Microsoft Teams, Photo Booth, Zoom, and Skype. This should solve the problem of the MacBook’s camera not functioning.
Even if Apple’s software is rock-solid, there’s a lot of unpredictability when it comes to its hardware. The unexpected might strike at any moment. As a result, if the camera on your MacBook is giving you problems, the following suggestions may be of assistance to you.
To locate a way out, you may try each of these methods one at a time.
What’s the problem with your Mac’s camera on Microsoft Teams? Restarting your Mac may be all it takes to repair the issue, depending on the specifics of your Mac. Leaving your device on for an extended time might have a negative impact on its performance. Numerous other issues with your Mac may be resolved with the help of this method as well.
Restarting your Mac is as simple as following these steps:

Test your camera to determine whether it can now be used. Continue looking for another option if the first doesn’t work.
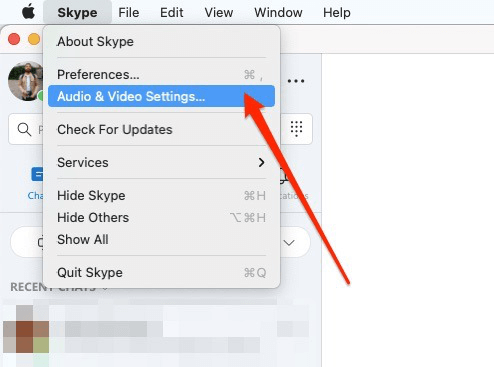
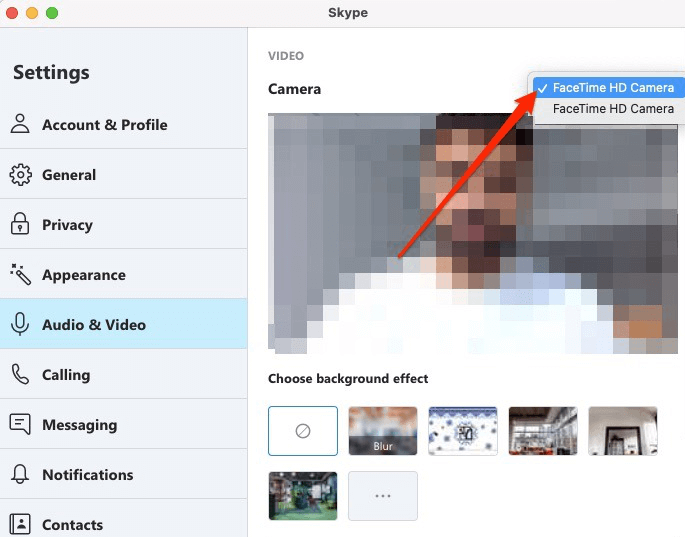
So you can’t modify the camera settings directly in System Preferences. However, most applications that utilize the built-in camera include various options that may be modified. When using FaceTime or Skype for video chats, you may choose the built-in camera or an external camera.
Using the app, you may change your camera settings.
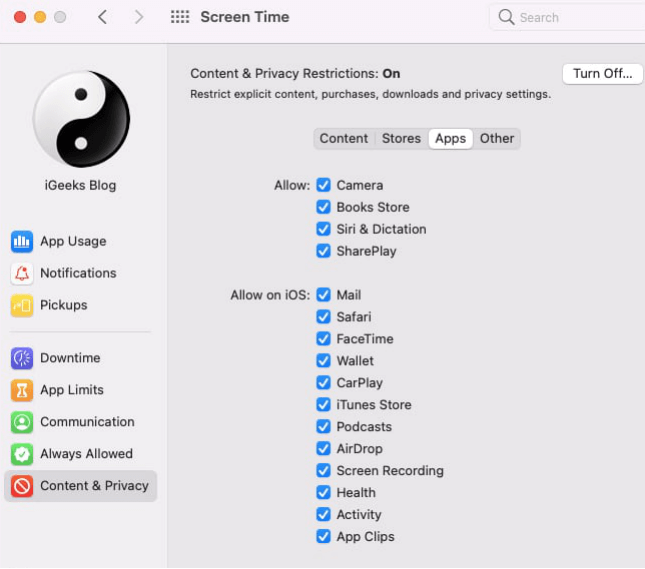
Screen Time is a built-in feature of macOS that lets you track how much time you spend on your computer. When it comes to parental controls, macOS may also prohibit access to the camera and any applications that utilize it.
Go to System Preferences > Screen Time > Content and Privacy, and then choose “Camera.” Check to see whether “Camera” is activated in the Apps tab. If it isn’t, you have two options: you may log in and ask the restricted person to remove it or modify the setting yourself.
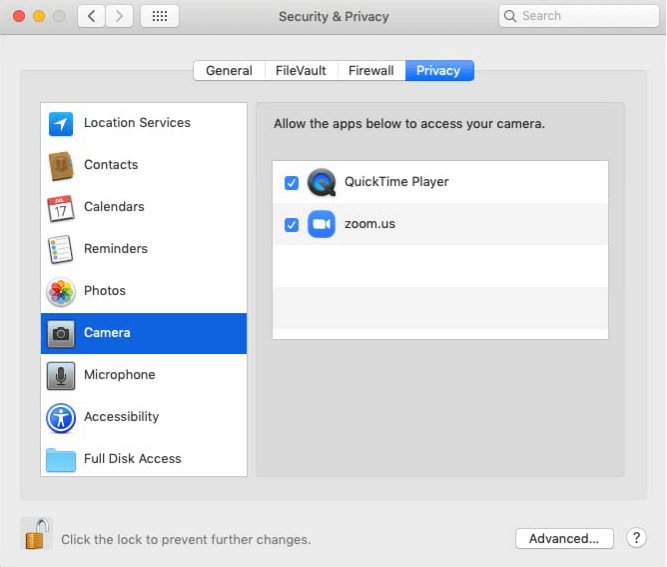
After upgrading to macOS Mojave or later, you’ll have more control over which applications use your Mac’s camera. Here’s how to see whether you’ve previously refused app access to your camera and grant it again.
There are many ways to use a camera, from photographing, filming, making video calls, and sharing our visual interactions. Having a MacBook isn’t easy since you’re certain to have technical issues with it at some time.
Due to apps or hardware faults, the built-in camera on your Macbook may abruptly cease operating. If you’re having issues with your Mac’s camera, try the steps in this article. I hope this instruction was useful and that you now have no trouble making video calls or other such things.
Magoshare Data Recovery for Mac
The best Mac data recovery software to recover deleted, formatted or lost data.
Free TrialSecurely and permanently erase data before selling, donating or giving away Mac.
Free TrialClone startup disk, external disk, USB flash drive, memory card and more on Mac.
Free TrialHOT PRODUCTS
Data Recovery