Easy steps to recover deleted, formatted and lost data from local disk and external device.
Free TrialDisk Management is a built-in Windows program for managing hard drives. You can use it for the management of advanced-level tasks, the majority of which cannot be completed using other methods. The nicest thing is that it can be used with both internal and external hard drives.
Disk Management may be used to create a new drive, extend or decrease sections, and change the boot order, among other things. You may also alter its design to your taste for a better touch screen. Let's look at all the ways you may access Disk Management in Windows 11 now that you have a good knowledge of the application.
Use Quick Access/Power User Menu
It is one of the simplest methods to get access to disk management. Basically, wherever you will want to open disk management you will see that the right icon of the Power user menu is clickable. So you will have to right-click at the quick access menu and choose the disk management from the given list of options.
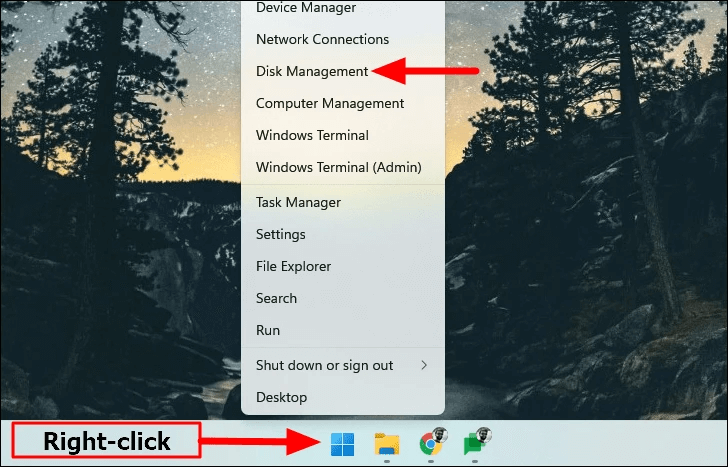
However, this process can also be accomplished through the keyboard where you will have to press Windows + x will immediately launch the quick access menu and you will be able to select this management from the same list of options that appears when you have right-clicked. In this way, you will be able to launch the Disk Manager tool. Now if you are facing any difficulty using this process we can move on to the next one.
Opening Disk Management using Search Menu
Another commonly used method for opening the disk management is using the keyboard buttons. For this purpose, the users who want to get access to the Disk Management simply type Windows+S which launches the search menu. Here they have to type "Create and format hard disk partitions" in the text field that appears at the top of the screen.
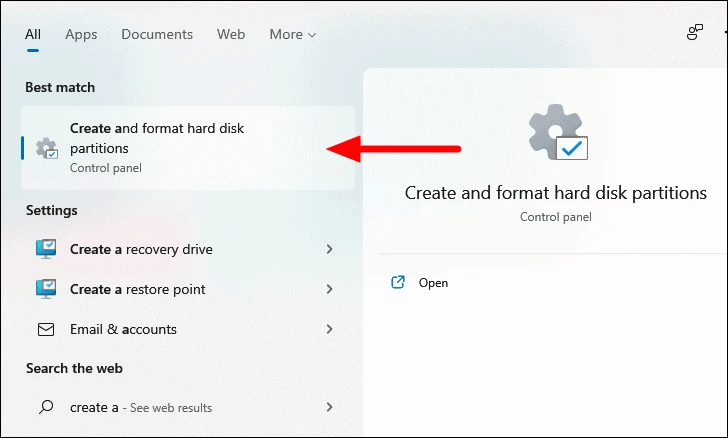
In this way, they will be able to find and search and click on the relevant search results to launch the app. This is also a simple method but it requires you to type a few words using the keyboard and cannot be done directly with the mouse. However, remember that always search suggestions are available and you do not have to enter a lot of text as results immediately start to populate as soon as you start typing. Simply you have to select the icon of Disk Management when it appears.
However, if you are a professional user you may want to use the Run command. So you should also know about this process.
Open Disk Management Using Run Command Method
Disk management is also accessible through the run command. However, very few people and only the developers prefer this option. For this purpose, they will have to press Windows+R which will launch the run command. In the search bar, you will have to type "diskmgmt. msc" in the text field that will appear and click on the enter button.
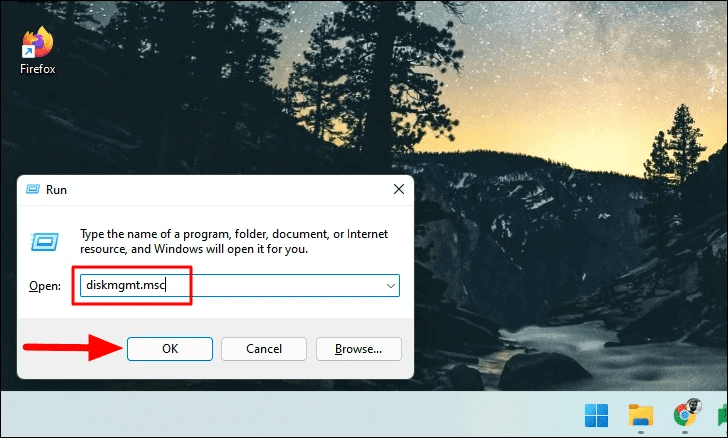
Doing this will immediately launch the disk management tool.
Opening Disk Management using PowerShell or Command Prompt
If you are also one of the users who prefer executive commands over the conventional methods, you should also know how to launch Disk Management with a simple command. Remember that it works perfectly for both Windows PowerShell and for command prompts.
For this purpose, you will have to press Windows + S as that will launch the search menu.
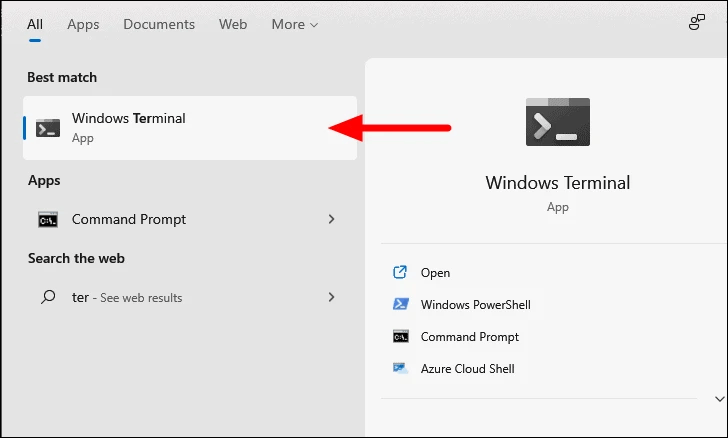
Here you will be able to see the text field at the top. In this field, you will have to type Windows terminal. When you type this, the search result for Disk Management will appear on the screen.
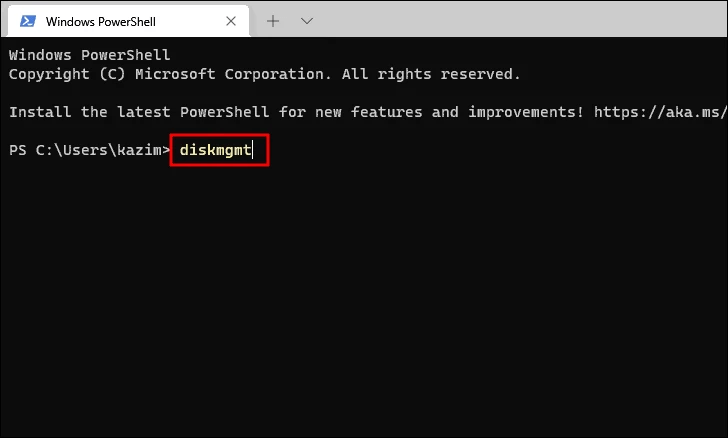
However, if you have not changed the default profile in the terminal you will have to enter a different command and write "diskmgmt" on the text field in order to launch the Disk Management tool.
Opening Disk Management using Computer Management App
The Computer Management software is a collection of tools that assist you in managing and completing different computer activities. Computer Management is the best alternative for many internet customers since it provides a number of features from a single interface.
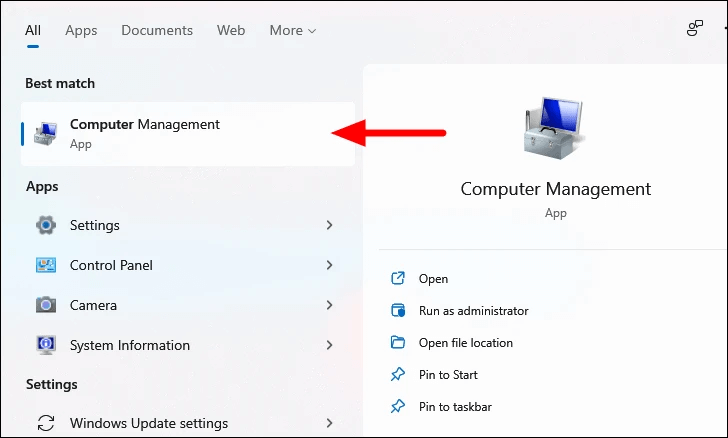
To open Disk Management, go to the 'Search' menu and type in 'Computer Administration.' Click the correct search term to start the program.
The bottom line
We have discussed the most important and commonly used methods for opening the Disk Management application in windows 11. You should not be worried about learning all the methods and tools. Knowing only the ones that seem comprehensive and understandable to you is enough. However, if you have the knowledge of each you will be able to quickly access Disk Management.
If you still have any questions regarding how to use the disk management tool in Windows 11, feel free to ask them in the comments section below.
Hot Magoshare Products
Securely and permanently erase data before selling, donating or giving away PC and digital device.
Free TrialClone boot disk, external disk, USB flash drive, memory card and more on Windows PC.
Free Trial
