Easy steps to recover deleted, formatted and lost data from local disk and external device.
Free TrialHow to Take Screenshot on Windows 11?

updated on 2022-02-20 to How To
As soon as the Windows 11 operating system was installed, many users encountered various issues, one of which was how to snap screenshots on Windows 11. When it comes to projects and assignments, screenshots are a must-have.
It helps in troubleshooting or guiding people through a procedure. When working from home or attending school online, it's critical to learn how to snap an effective screenshot on your laptop or desktop computer.
Windows 11 doesn't need any special knowledge to take a screenshot. The process of capturing a screenshot in Windows 11 will be explained here, and numerous methods for taking a screenshot on the Windows 11 OS will be addressed.
Windows 11's Best Methods for Taking Screenshots
On Windows 11 PCs, there is a slew of ways to take screenshots. You'll find a slew of built-in tools for taking screenshots in Windows 11.
Method 1: Using Keyboard Shortcuts
As an alternative to opening an application every time, use one of these keyboard shortcuts instead.
Using the PrtScr Key
Pressing the PrtScr key will take a short screenshot for you. This is it—the whole Windows 11 screen will be saved. However, the picture will be copied to the clipboard rather than saved as a PNG screenshot when using PrtScr.
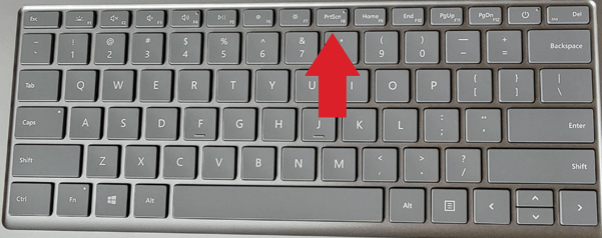
If you need to send a screenshot in an email, or if you want to edit the picture before storing it, this way is useful. This image will be transformed into a screenshot when you open an image editing software, paste the screenshot, and then save it.
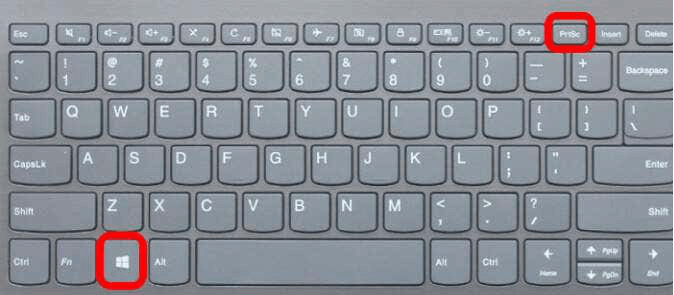
Using the Win + PrtScr Key
To take a screenshot of the complete Windows 11 desktop, you'll want to use this shortcut instead. Simply hold the Windows key while pressing PrtScr, and your pictures will be stored in the Pictures folder under the screenshots folder, just as with all other Windows screenshots.
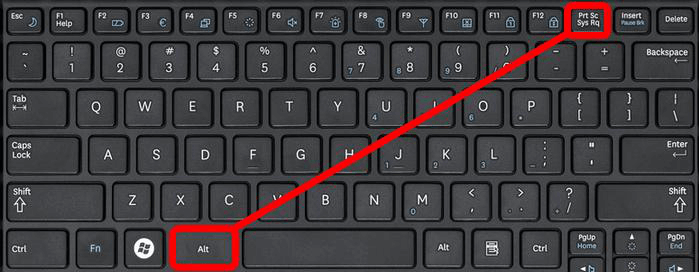
Using the Alt + PrtScr Key
The preceding techniques of cropping the whole screen may not be acceptable for you if you often open many tabs and apps on your screen. It's not, at least not if you're seeking that specific result. The Alt + PrtScr shortcut may be used to get around this problem.
There is no need to have many tabs open on your computer when you take a screenshot this way.
Method 2: Using the Snipping Tool
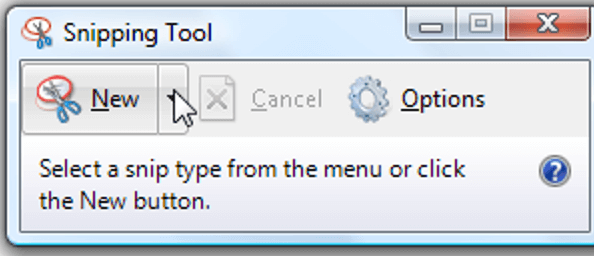
Snipping Tool in Windows 11 is a more sophisticated method of capturing a screenshot. Most of the functions seem to be carried over from Windows 10, but, as seen in the picture, the snipping tool will be replaced with a more intelligent version in the future.
However, you can still save, edit, and draw on screenshots with this wonderful little tool.
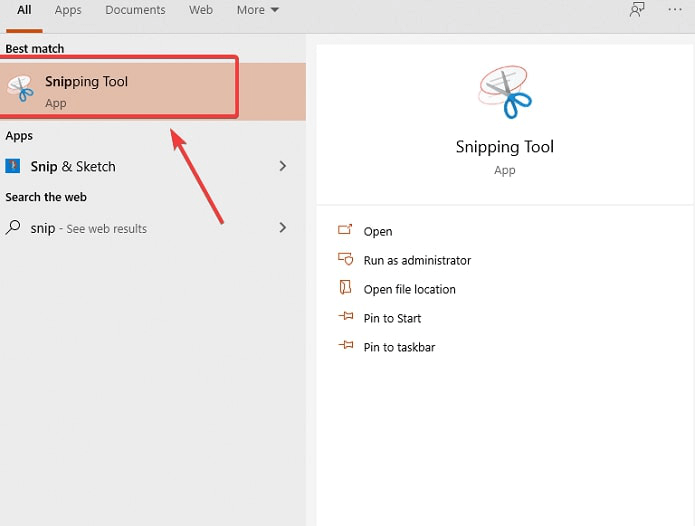
Open the program by typing "Snipping Tool" into your Windows search and selecting "Open" from its menu.
You may choose a new snip in the upper right-hand corner of the program. To begin a new snippet, just click on the button to the right of it.
You'll see that your mouse cursor has been transformed into a crosshair. Simply drag the snipping tool over the area you'd want to capture by clicking and dragging the tool.

At this point, you'll be able to save and alter the image you just took in a paint-like window.
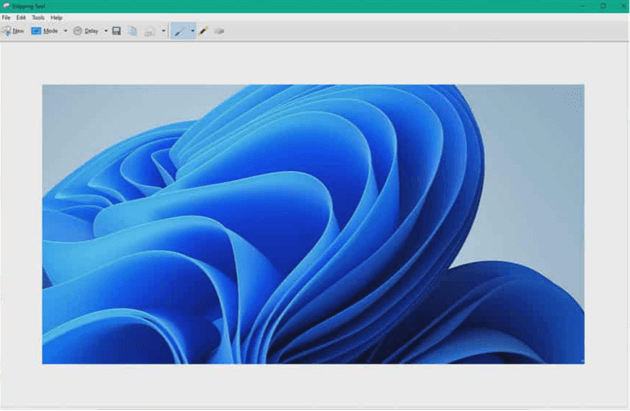
You may highlight or underline certain text sections using the different tools offered while capturing a screenshot.
Method 3: Take Delayed Screenshots Using the Snipping Tool
A few minor changes and enhancements have been made to the Snipping Tool, which comes pre-installed with Windows 11. Snipping Tool may be found by searching for it in the Search function and then opening the program to capture a screenshot.
A mini-Menu for Snipping Tool appears when you click on New in Snipping Tool. From there, numerous snips are available for selection.
However, the full version of the Snipping Tool allows you to choose from four different snipping modes (rectangular, freeform, window, and fullscreen) as well as a delay option. Three, five, and ten-seconds delays are available.
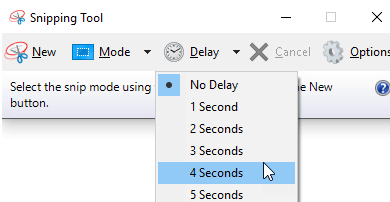
So, you will be able to set up your photo before shooting it, which may be more convenient than doing it manually. In order to copy the delayed snapshot to your clipboard, just press Win+Shift+S. Click on the screenshot preview to make any changes or save it as a JPEG, PNG, or another image format on your computer.
Method 4: Using Xbox Game Bar
You may also snap a screenshot or record a video using the Xbox Game Bar.
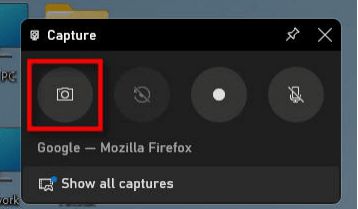
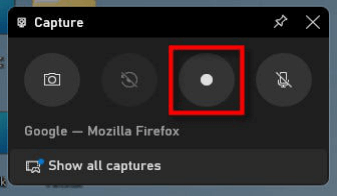
To get started, press Windows+g on your keyboard to bring up the Xbox Game Bar. Once the "Capture" widget displays, you may use it to take screenshots in PNG and MP4 formats.
On Xbox Game Bar, if you don't see the "Capture" window by default, go to the "Widgets" button and then pick "Capture."

Hit the camera icon in the "Capture" window (located by default in the upper left corner of the screen) to capture a screenshot of the currently open app (or desktop, if no app is active).
Similarly, Click the record button (which appears as a little white dot within a bigger grey button circle) to capture a video of the currently active app. It's worth noting that Windows 11 doesn't allow you to shoot a video of File Explorer or the desktop; only an active program may be recorded simultaneously.
Press "Stop" on the Xbox Game Bar floating toolbar or the Xbox Game Bar Capture widget to stop recording.
Captured screenshots and videos may be found in the C:\Users\[username]\Videos\Captures folder after capturing. The "Gallery" widget in the Xbox Game Bar may also be used to look at the images. To dismiss the Xbox Game Bar, either click a vacant area of the screen or use the Escape key.
Conclusion
You've just learned how to capture a screenshot in Windows 11 using our step-by-step instructions. You may copy, save, modify, and even alter your most recent screenshots using Microsoft's new operating system.
My preferred method of taking screenshots will always be the basic PrtScr button, but it's not enough for many people. Fortunately, Windows 11 has many more complex options for taking a screenshot.
If you want to recover deleted/lost screenshots or images, you can try Magoshare Data Recovery to scan the Windows 11 hard drive and get all lost files back!
Hot Magoshare Products
Securely and permanently erase data before selling, donating or giving away PC and digital device.
Free Trial
Clone boot disk, external disk, USB flash drive, memory card and more on Windows PC.
Free Trial