Four Methods to Back Up Photos on Mac

updated on April 19, 2023 to Mac Disk Clone
Quick Navigation:
- 1. How to back up photos between iCloud and Mac?
- 2. Backup iPhone images to your Mac with Photos App
- 3. How to use Time Machine as a photo backup?
- 4. Back up photos on Mac using disk copy software
- 5. Conclusion
Summary: In this article, we will introduce 4 methods to help in backing up photos on or to Mac. Could storage, Time Machine, iPhone backup and disk copy app can help you securely back up Mac photos, just read on.
Because your photographs are irreplaceable keepsakes, you should take every precaution to ensure their safety. The good news is that we automatically back up your Photos library if you use iCloud. However, knowledge is power. Even if you haven't signed up for iCloud yet, here's how to safeguard your photo collection in a centralized location.
If you've lost some happy memories because of the loss of photos, Time Machine can help you regain them. Images Library can be readily restored from a Time Machine backup if you accidentally lose images or format the macOS drive.
However, if you've tried Time Machine and failed to recover your lost images or need some pointers on restoring your image files from Time Machine, this article is for you. Furthermore, there is another method to restore images on Mac without a Time Machine backup if you have lost or deleted photos and cannot locate them.
How to back up photos between iCloud and Mac?
When you enable iCloud Photo Library, all photos in your Photos or iPhoto Library are uploaded to the cloud. Any new photos taken with an iOS device are automatically added to your iCloud Photo Library and available on all other devices.
The photos in your iCloud Photo Library can be safely backed up by downloading them to your Mac. If your Mac's internal storage is full, your iCloud Photo Library should be backed up to an external disk.
- Clicking the Photos App's Dock icon will launch the program.
- Select Preferences or Settings from the menu when you click Photos in the main menu.
- In the settings menu, click the iCloud button.
- Select the iCloud Photo Library check box.
To have your images saved locally on your Mac in addition to iCloud, select Download Originals to this Mac. Click Optimize Mac Storage if you're told your Mac is full and you want to download lower-resolution versions of your photos. When you need them, you can get high-resolution photos down from iCloud whenever you like.
Backup iPhone images to your Mac with Photos App
- Use the USB cord that came with your iPhone to link it to your Mac.
- It's time to fire up the Photos program on your Mac. When you connect your iPhone, the app may launch automatically. The iPhone icon should display in the app's top left corner.
- The Import button should be selected. It's a button near the window's title bar. The window below the tabs will show the photographs and videos from your iPhone.
- Pick out the pictures you wish to upload. Just click on the pictures to proceed.
- Select Import (#) Selected to import the selected items. The location is at the top right of the display. Select Import All New Items to copy all iPhone pictures that aren't already on your Mac.
- Choose the album tab. It's near the top of the glass panel. The "Last Import" album is where your most recent file transfer will be stored.
How to use Time Machine as a photo backup?
Apple knows how important it is to have a backup of your images, so they pre-installed their backup tool, Time Machine, on every Mac.
Time Machine allows you to schedule automatic data backups, including applications, media, files, messages, etc. Time Machine requires nothing more than an external drive to create backups.
Use Time Machine for a photo backup:
- Select Time Machine under System Preferences on your Mac.
- Just choose a disk to back up onto. Choose the disk that contains your external drive's backups in the Time Machine preferences box.
- Finally, select Use Disk.
- The time it takes to transfer your images can vary based on how many you have. While you wait, go ahead and congratulate yourself.
The problem with Time Machine is that backups are not compressed very well. Thus they take up an excessive amount of space. The situation becomes more troublesome because of Time Machine's inability to control the backup schedule.
Back up photos on Mac using disk copy software
You can back up your photos to an external hard drive or USB flash drive by using a disk copy tool. It can help you copy photos from Mac to the external hard drive or just clone all data from the Mac disk to the external hard drive. Just download it here:
AweClone for Mac
- Copy data from Mac to external hard drive.
- Create a bootable clone backup for Mac.
- Create disk image backup for Mac.


Now, follow the steps below to help you back up photos from Mac to an external hard drive:
Step 1. Open AweClone for Mac, and connect the external hard drive to your Mac. Select disk cloning mode - Disk Copy. It will help you selectively copy files from Mac to the external hard drive.
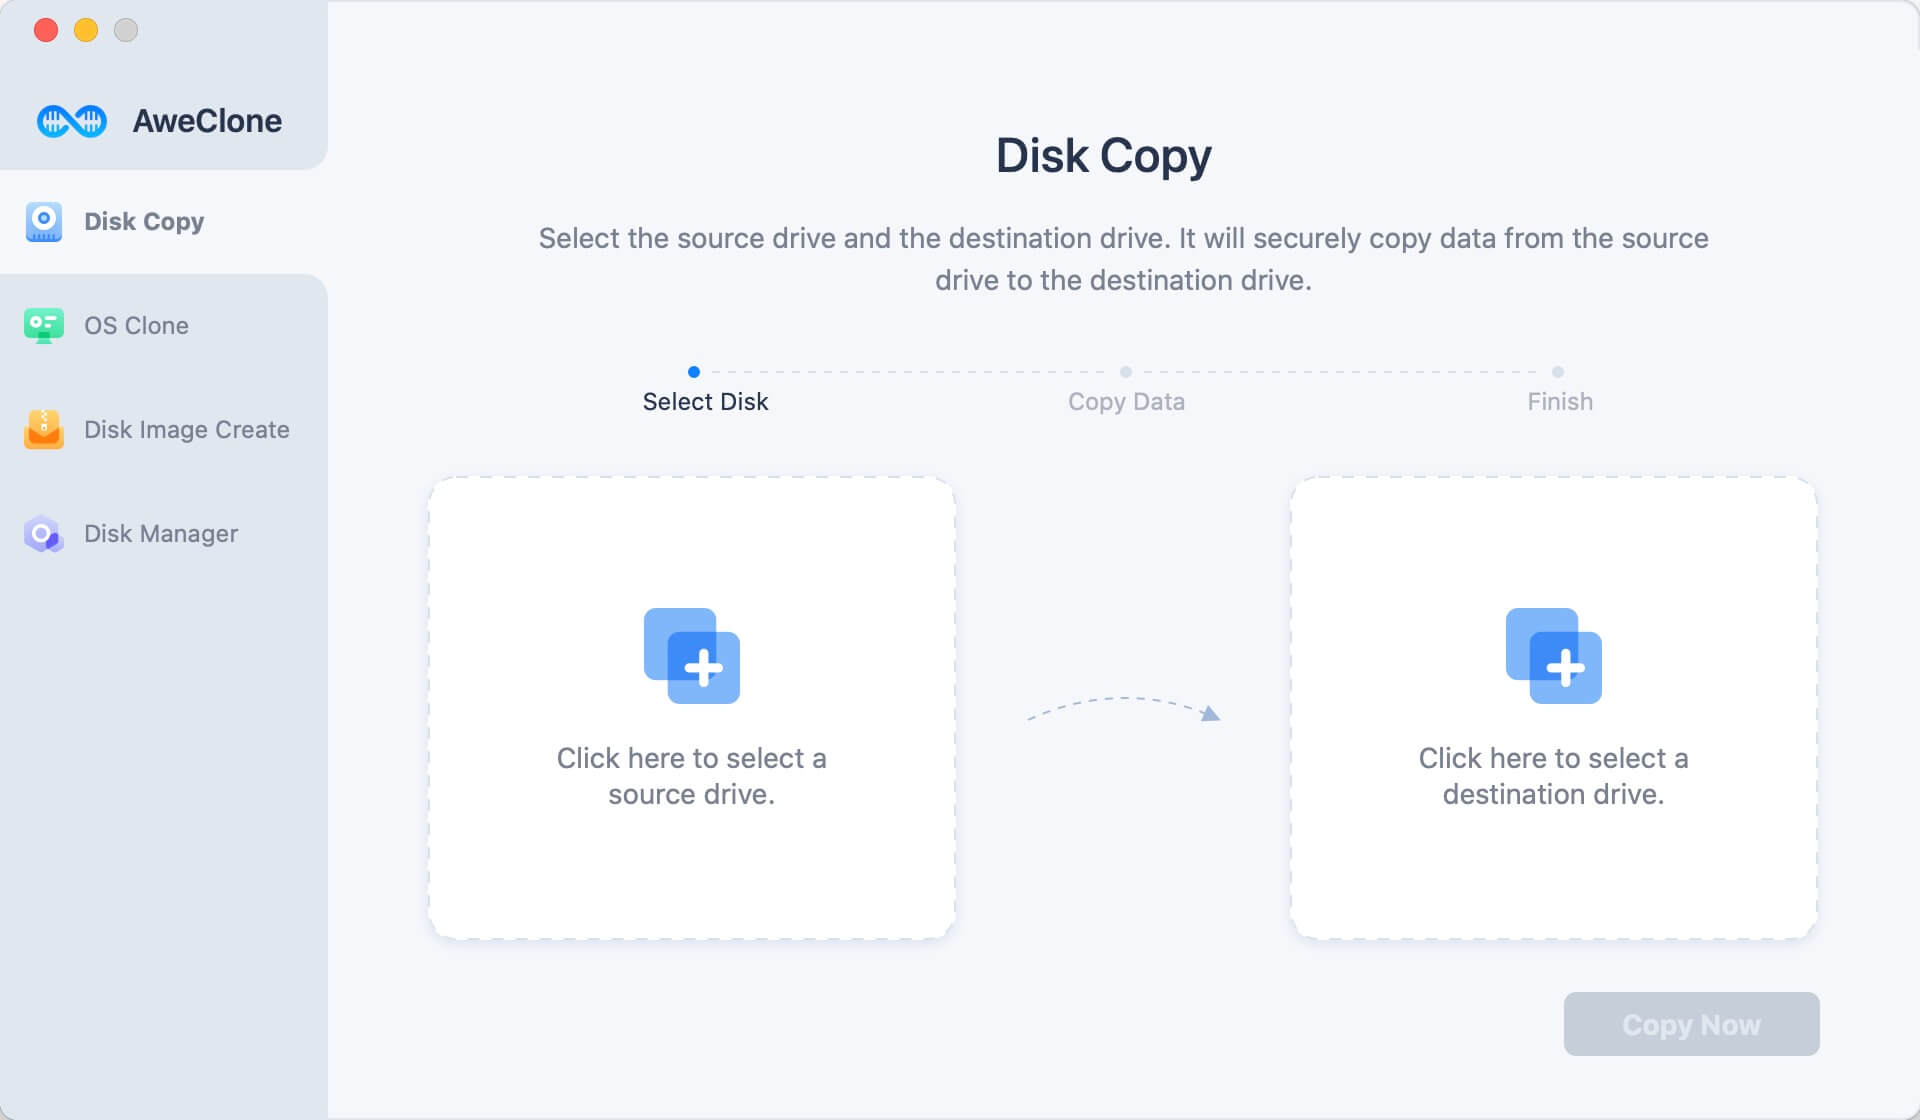
Step 2. Select the Mac hard drive as the source disk and then select the external hard drive as the destination drive.
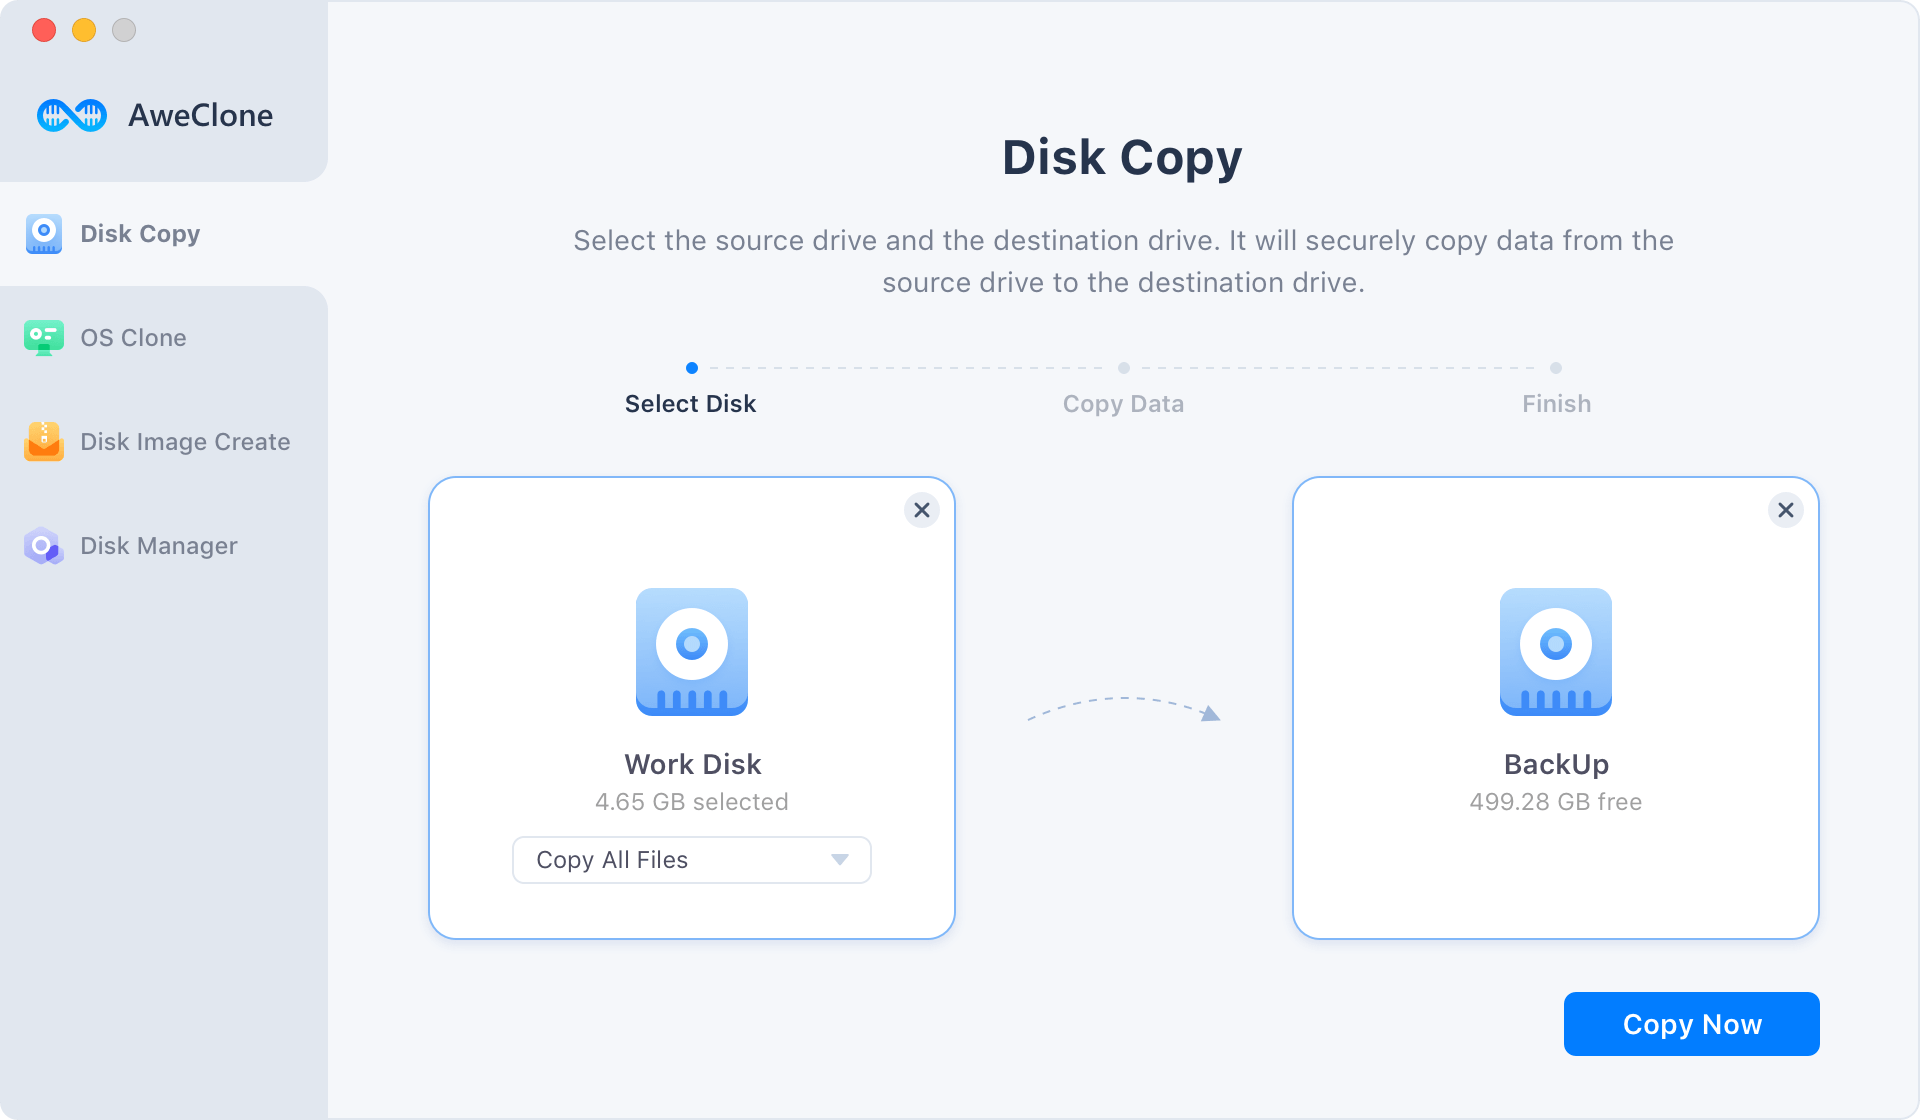
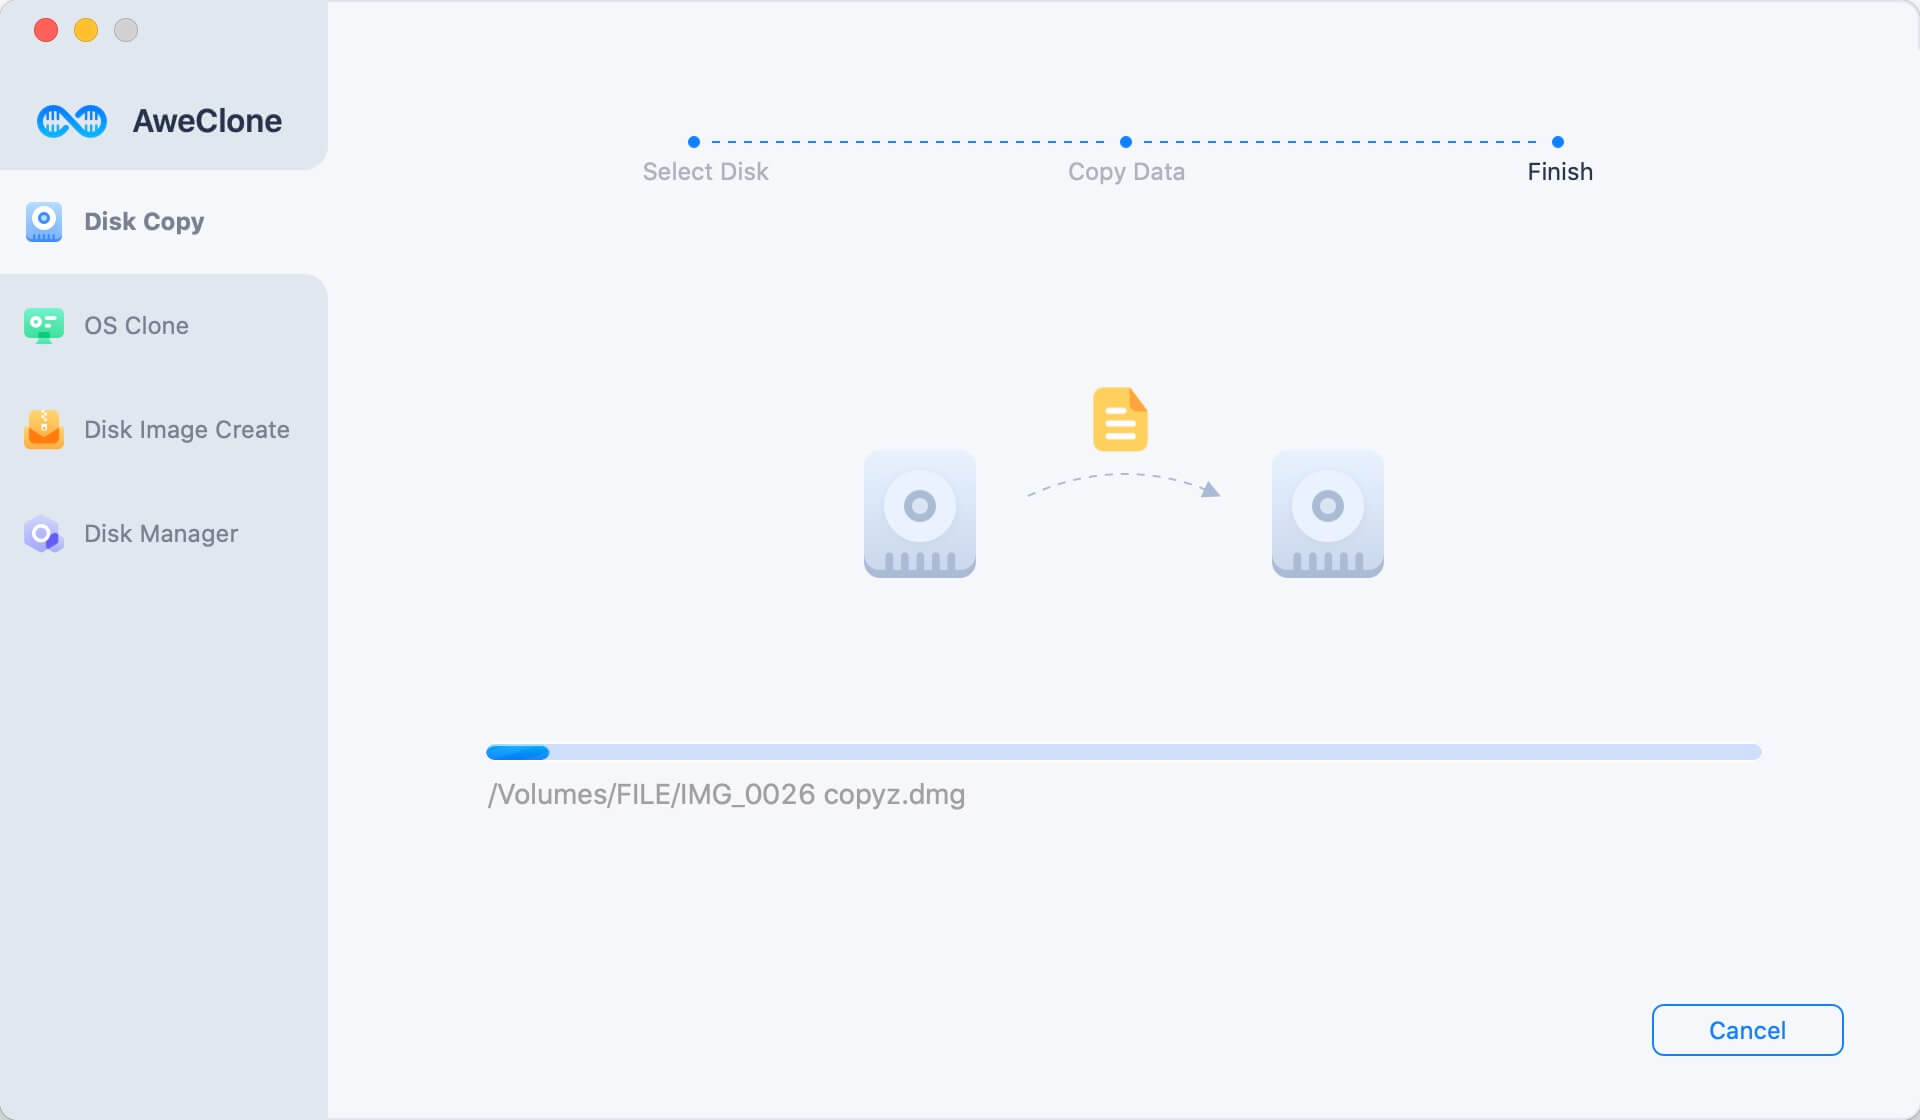
Step 3. Click on Copy Now button to copy files from the Mac hard drive to the external hard drive.
Conclusion:
We've never taken so many photographs before. Putting film negatives in a shoebox is so last century. Digital photography is more transitory because of its very nature. Therefore, it is much simpler to misplace your photographs. Create a system that works for you to back up your photos regularly. Your pictures are safe in the cloud, even if something happens to your computer or phone.
These are the most reliable methods for protecting your images. Back up your photos! It is strongly recommended to back up your photos or even all data on your Mac. AweClone for Mac is a powerful disk cloning application, it can help you create a full backup for your Mac.