Time Machine vs Disk Clone - What Is the Best Method to Back up Mac Data?

updated on 2022-05-23 to Mac Disk Clone
A Mac user can face many unwanted events that can result in the loss of precious data. Any data can be regarded as important regardless of its type. It can be a simple message from your executive or a file that you don’t want to lose at any cost.
There are different instances responsible for data loss in a Mac user’s life. A critical hardware failure may render the hard disk irretrievable, therefore, resulting in the loss of your stored files. Or a rather rare and unpredictable occasion such as a theft involving your Mac computer can leave you empty-handed both in terms of your vital data files and of course, your dear Mac computer.
Although these incidents are unavoidable, there are steps that a Mac user can take to store and access the important files in case of a data loss event. In this regard, two basic approaches can be followed to back up your Mac files: Time Machine and Disk Cloning.
These two methods are different from each other in many ways. To help Mac users search for the best suitable option between these two, we have dedicated this article to brief them about all the possible differences between them, in a comparison that we call Time Machine Backup VS Disk Clone. So, stay tuned.
Time Machine
Apple has given a built-in backup facility to its Mac users, called Time Machine. It can automatically backup user data from a MacBook or a Mac Desktop. It can be accessed by clicking on Time Machine sign on a Mac computer’s homepage.
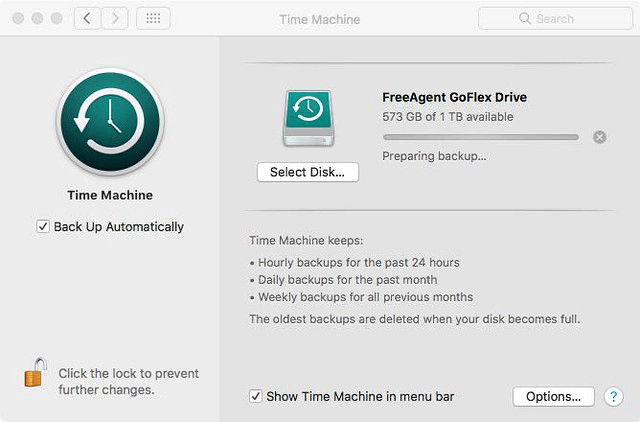
You can start by selecting Time Machine Preferences to find its different settings. Here, you will find the option “Select Disk” or “Select Backup Disk”. Selecting this option will let you select the disk where you want to store your backup files. A backup drive can be an internal disk drive of your Mac’s hard drive, or you can use an external drive to keep your backup.
Apple has made Time Machine very flexible and user-friendly in its work. In fact, there are some features in this software that you may not be able to find elsewhere.
For example, it gives you the freedom to select and skip specific data portions that you do not want to back up. Moreover, it also allows you to back up your data to multiple disks. Time Machine also deletes the oldest backup once the backup disk is full, to make room for updated data.
Apple mentions on its website that Time Machine can automatically backup Mac files that are chosen for backup at a 24-hour interval. But if a user wants to do a manual backup without waiting for the next auto backup, the “Back Up Now” option can be selected by clicking on “Time Machine” sign on your Mac’s homepage.
Disk Cloning
Continuing this Time Machine VS Disk Clone discussion, now we will discuss the disk cloning method. A disk clone is usually a 3rd party software that is used to back up data from a Mac computer. As the name suggests, it is useful in making a clone of one hard drive to another if the criteria match.
A disk clone will make a clone of your Mac computer drive including its macOS. Hence, this clone can be booted up later another suitable computer using an external drive to immediately resume Mac operation without having to wait for OS installation, if the system requirements are met.
The basic requirement for disk cloning is that the backup drive should have enough free storage to accommodate the burden of the incoming data. For example, if the cloneable data size is 500 GB, then the backup hard drive should have at least 500 GB of free space to store the cloned material.
Disk clone backup is time stamped. It means that the backup made with cloning software will remain to be the same as it was at the time of backing up. It will not update, nor will it increase in size. Furthermore, it will be saved as a backup that was made at a specific period.
Time Machine VS Disk Clone, Which is Better?
Now that we have learned both in detail, it’s time to decide which is better than the other by comparing their features on the table. Below is given a rough comparison of both methods.
1. Time Machine backups are updated at regular intervals and can also be done manually. Moreover, you can select the files or partitions that you want to skip. Conversely, disk cloning is a one-time backup that is used to back up an entire hard disk. With disk clone, you are pretty much out of choice for selecting specific files to back up.
2. Disk cloning backs up a complete hard drive including the installed macOS of that computer. Therefore, you can boot right from this backup on another computer if the system requirements are matched. Time Machine does not back up the operating system, hence, you cannot boot from this backup.
3. For disk cloning, you should have a secondary hard drive with enough free storage to house the cloned storage. As for Time Machine, there is no storage restriction. You can back up as many files as you have free storage on your target hard drive. You can also prioritize your backup plan to store more important files first and skip the ones that are not so vital.
From this Time Machine VS Disk Clone discussion, the selection of one over the other is pretty much a Mac user’s choice and requirement. For example, Time Machine is not for someone who needs a disk cloned to start immediately on another computer. For this, only a disk clone would suffice the needs.
Similarly, a disk clone is not someone’s bite if they need to back up just a specific part of their hard drive.
Create a bootable clone backup with AweClone for Mac
AweClone for Mac is one of the best disk cloning software. It can help Mac users securely clone hard drive or create a disk image. Download it here:
AweClone for Mac
- Clone HDD, SSD, external hard drive, other device on Mac.
- Create a bootable clone backup for Mac.
- Create disk image of any hard drive on Mac.


Now, follow the steps below to create a bootable clone backup for Mac:
Step 1. Download and install AweClone for Mac. Then run it from Launchpad.
Step 2. Connect an external hard drive to your Mac. Make sure the external hard drive has enough disk space to store data on your Mac.
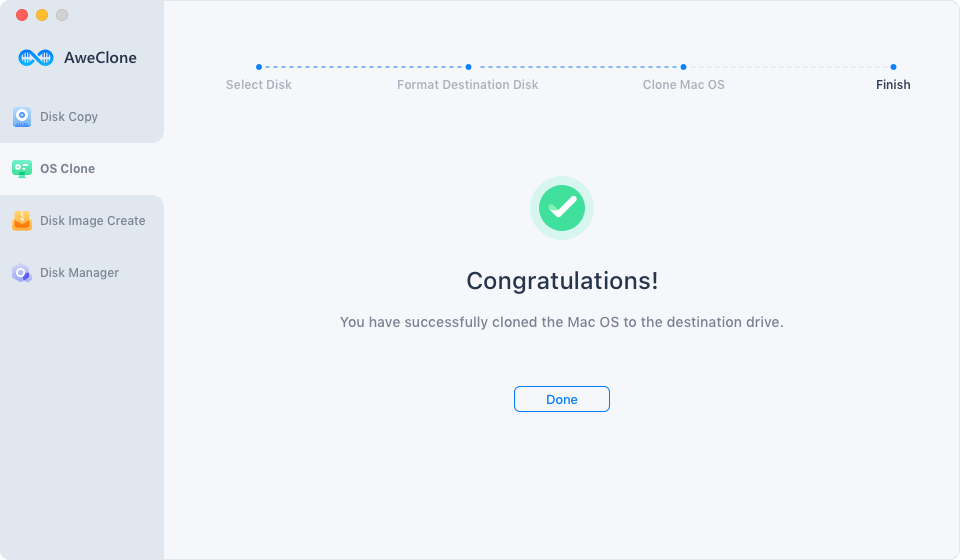
Step 3. Choose disk clone mode - OS Clone. This mode will help you clone Mac startup disk to an external hard drive and make it be bootable.
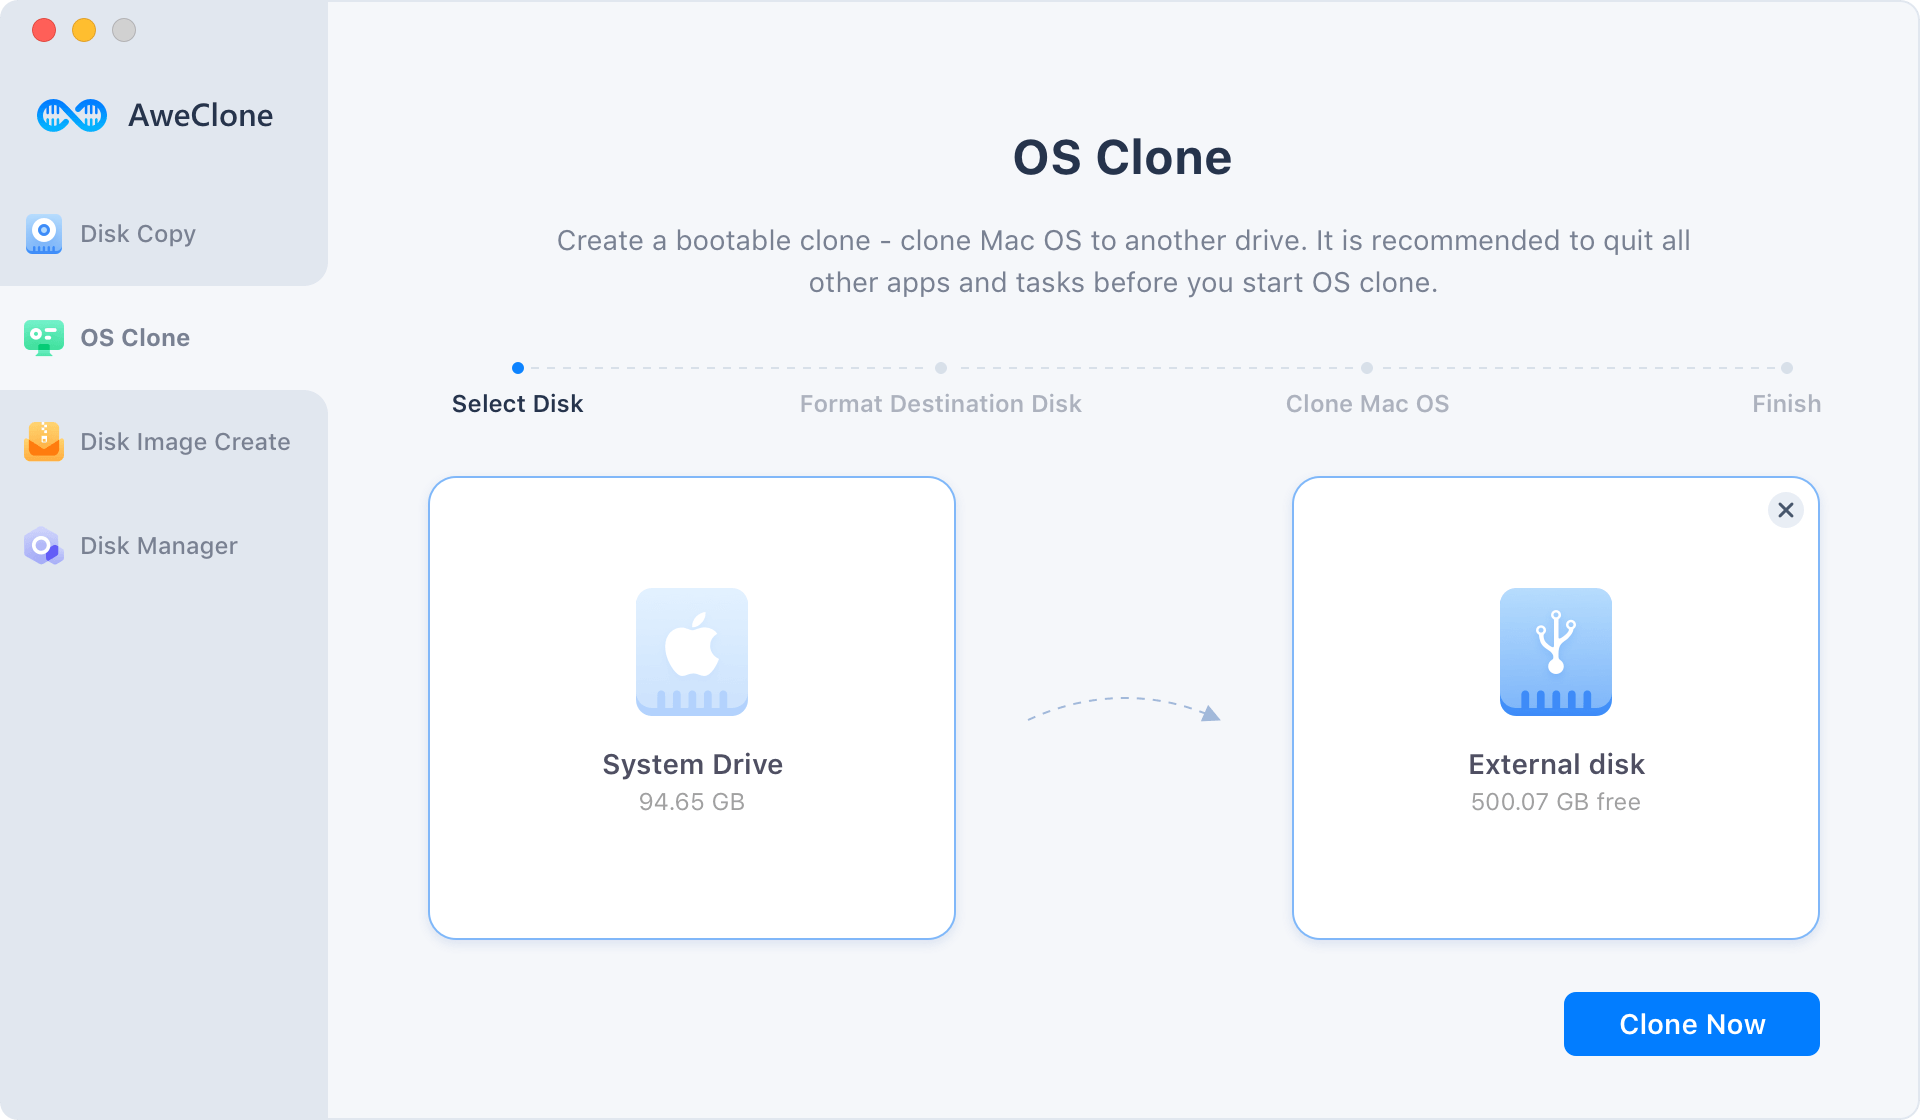
Step 4. Select the external hard drive as the destination drive and click on Clone Now button.
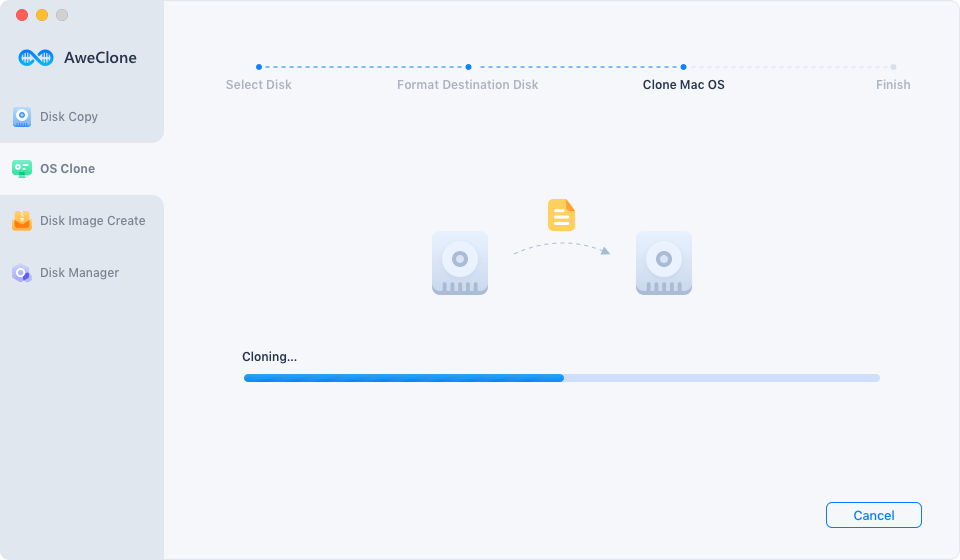
Once the process gets finished, you will get the bootable clone backup. You can use the external hard drive as a startup disk or use it to restore macOS.