How to Transfer Data from Old Mac to New Mac?

updated on 2022-05-24 to Mac Disk Clone
If you have just bought a new Mac and looking for how to transfer data to your new Mac from your old Mac, then this is the right place. Let us congratulate you first on your new purchase, and we hope it will work like a charm for you.
Buying a new Mac is not always an easy decision as there are a few things that can raise some concerns while deciding to purchase. For example, the headache of data transfer. If your old Mac has lots of GBs worth of data that you want to be transferred to your newer machine, it will demand some toil to be done before you can be in your comfort zone to use your new Mac computer.
In this article, we will discuss an official migration method plus a couple of bonus backup methods that can help Mac users transfer data between their Mac computers in the most suitable manner. Without further delay, let us get into this.
Migration Assistant of Mac
Apple’s Mac OS has a built-in tool that let you transfer data to your new Mac from your old Mac, termed Migration Assistant. It copies the user files to move them to your new computer and saves you time as you will not have to copy them manually.
Please remember that this method only applies to a Mac-to-Mac data transfer. For PC-to-Mac transfer, there is a different guide page available across the web.
To start with Migration Assistant, there are a few requirements that should be met for a smooth transfer process.
- Both Mac computers need to be software-updated.
- If both computers are running OS X El Capitan or an earlier version, then both need to be connected to the same network.
- If both Mac computers are running OS Sierra or later, simply connect them to Wi-Fi and place them close.
- On your old Mac, from System Preferences, select Sharing. Here, the computer name field should have a name in it.
- Disable antivirus or firewall, if any, on both computers till the transfer is complete.
Once these things are ensured, follow the below steps in order.
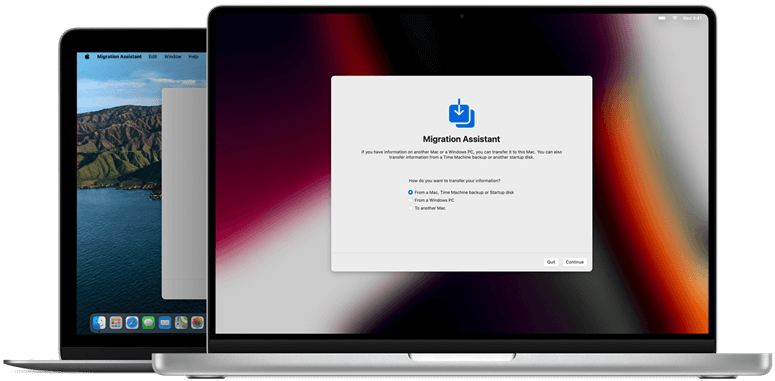
1. On the new Mac, open the Utilities folder and open Migration Assistant. Once opened, click Continue. If Migration Assistant asks for permission, enter the administrator password. Furthermore, select the first option, “From a Mac, Time Machine backup or Startup disk”.
On the old Mac, open Migration Assistant and click Continue. As for transfer information, select the third option which should be “To another Mac”.
2. Now, on your new Mac, a Mac computer icon should appear with your old Mac’s name. Select it and hit Continue. While on the old Mac, a security code should appear. After making sure that it matches with new Mac’s security code, press Continue.
3. On your new Mac computer, select all those fields that you wish to transfer to it and click Continue. It will start the transfer process and can take a long time if the files are large. When the process is done, close Migration Assistant on both computers. That is it.
If the purpose of data transfer is to sell your old Mac, then make sure to sign out all your accounts such as iTunes, iCloud, etc. Moreover, try to factory reset it. This will prevent strangers from accessing your leftover data on that computer.
Backup Methods
Another way to transfer the data between your Mac computers is by backup and restoration. This way you can back up your files to your external drive and then restore them to your new Mac. Two methods can be adapted to perform such tasks: Apple’s Time Machine & Disk Clone (3rd Party Method).
Time Machine
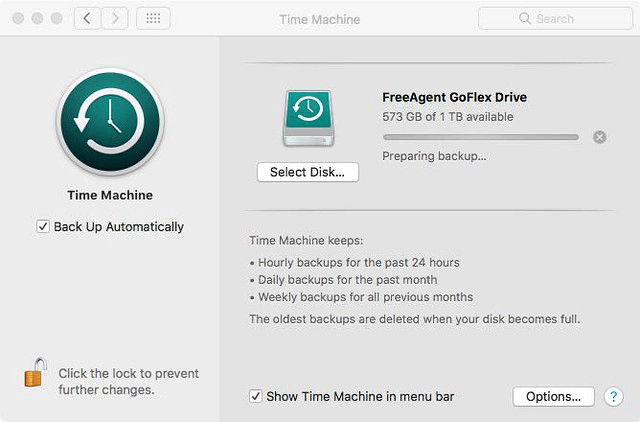
Apple provides its Mac users with a native facility to backup data on Mac computers which is known as Time Machine. It is a good handy program that lets you save your data to an external or internal location so that you can access it later. (For transfer purposes, it is better to save it in an external drive to save your valuable time).
The operation of the Time Machine is also easy, no hard learning is required. First, you will need to open Time Machine using System Preferences by clicking on the Apple Logo on your Mac’s homepage. This will open the Time Machine tab on your screen.
Following on-screen steps, you can select the backup disk where you want to store the chosen files and perform the backup. A major advantage of using Time Machine is that your data is automatically backed up at specific intervals (usually at 24-hour intervals). Hence, there is no need to backup files manually to keep them up to date as Time Machine is enough to do that.
Once you have decided to transfer the backup data to your new Mac computer, connect your backup external drive to it and restore the data according to your preference.
Disk Clone
Disk clone is another viable option to backup Mac data although it is a bit complicated when compared to Time Machine. Basically, it involves the installation of a 3rd party cloning software to backup files to an external storage device. Disk cloning is different from Time Machine in a few ways.
Firstly, this process is based on the term “cloning” which is synonymous with “exact copy”. Using cloning software, you can create an exact copy of your old Macintosh computer’s data including its OS. Having said that, cloning is feasible only when you also want to migrate OS from your old Mac to your new Mac. Moreover, there is no way in cloning, to backup individual files and skip the remaining data, unlike Time Machine. Nonetheless, it is a great tool to transfer your entire Macintosh data to your new Mac computer without much hassle.
You can check a suitable cloning software for Mac on the web. Do not forget to check for the restoring process of the clone as it is vastly different from the Time Machine backup method, especially with the involvement of the Mac recovery partition and Apple’s Disk utility.
Download the reliable disk cloning software - AweClone for Mac.
AweClone for Mac
- Clone HDD, SSD and external disk on Mac.
- Create a bootable clone backup for Mac.
- Create disk image backup for Mac.


Follow these steps to create a bootable clone for Mac:
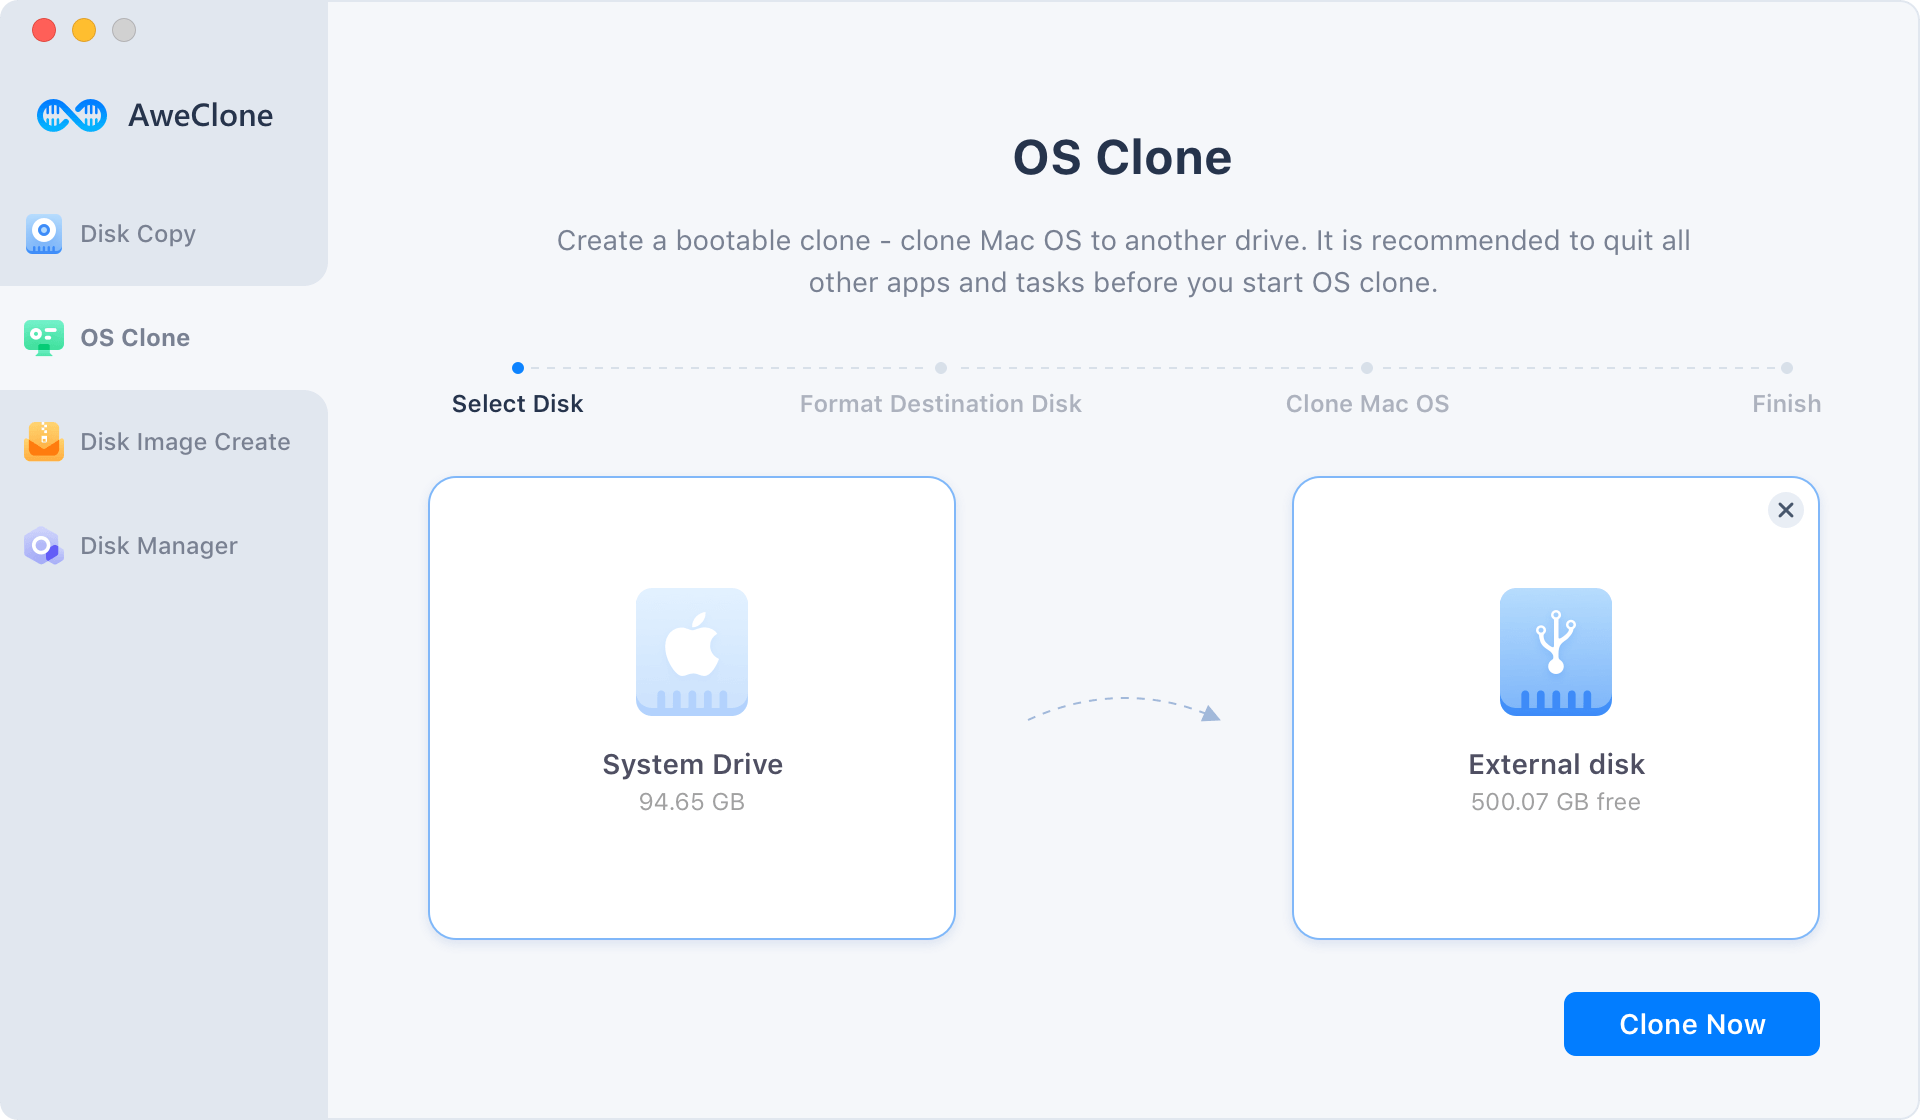
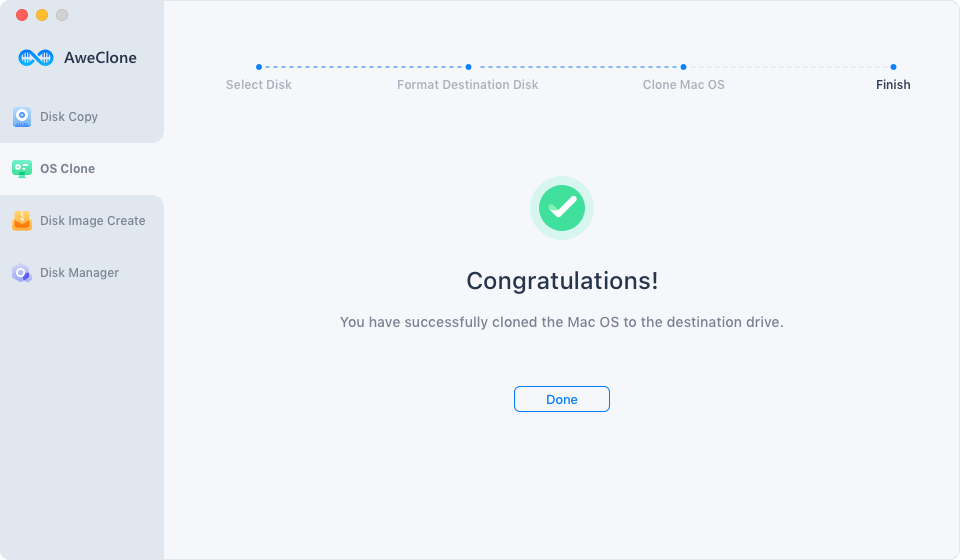
Step 1. Connect an external hard drive to your Mac, then open AweClone for Mac, choose disk clone - OS Clone and then select the external hard drive as the destination drive.
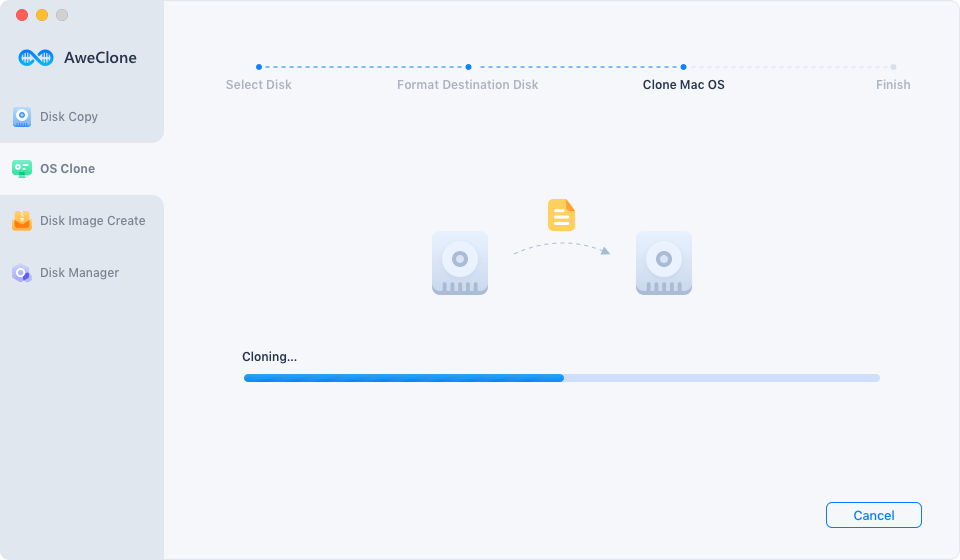
Step 2. Click on Clone Now button to securely clone all data including macOS data, applications, files, settings on the startup disk to the external hard drive.
Once the process gets finished, you can use the external hard drive as a startup disk on your new Mac or use it to restore macOS from the external hard drive to the new Mac startup disk.
Conclusion
In this article, we have mentioned a total of three methods that can help you transfer data to your new Mac from your old Mac. We hope that after reading this article, you will be able to transfer the files between your Mac computers smoothly.