Clone Mac Hard Drive Using Disk Utility

updated on 2022-08-05 to Mac Disk Clone
Although the software alludes to the operation as Restore, as in moving data from a source drive to a destination drive, Disk Utility has always had the ability to make clones. Drives aren't the only thing that can be restored. Any storage device that you can mount on your Mac will function with it, including USB flash drives, hard disks, SSDs, and disk images.
While it is still possible to make an identical copy (a clone) of any drive that is physically attached to your Mac, using Disk Utility's Restore feature to clone your startup drive now requires additional procedures.
How Restore Functions?
Block the Disk Utility's Restore feature uses copying to expedite copying data. Additionally, it creates a nearly perfect replica of the originating device. The phrase "nearly exact" refers to the fact that a block copy transfers the whole of a data block from one device to another. Nearly the same as the original, the outcomes. Data is copied file by file during a file copy. The file will probably be located in a different place on the source and destination devices, but the information will remain the same.
Block copying is quicker, but there are some restrictions on when it may be used. The main one is that unmounting the source and destination devices from your Mac is necessary before you can copy a block by block. Block data won't be altered throughout the copying procedure thanks to this. However, you are not required to perform the dismounting. The Restore feature of Disk Utility takes care of that for you. However, it does imply that when you use the Restore capability, neither the source nor the destination can be in use.
Bringing Back a Non-Startup Volume
On the current starting disk or any other drive that has files open, you cannot utilize the Restore feature. You may utilize either the Recovery HD volume on your Mac or any disk that has a bootable copy of OS X installed if you need to clone your startup drive.
The Disk Utility software will launch and show a single window divided into three sections: a toolbar, a sidebar displaying the drives and volumes that are presently mounted, and an info pane presenting details about the device that is now being selected in the sidebar.
You could be running a Mac OS version earlier than this one if the Disk Utility software does not look exactly like it does in this description. You can find instructions for using a previous version of Disk Utility to clone a drive.
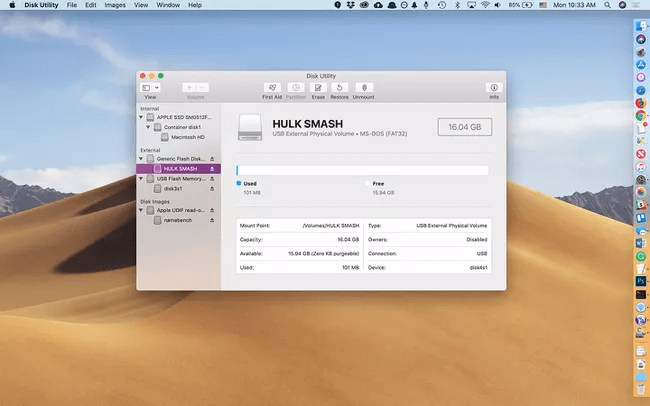
Choose the volume to which you wish to copy or clone data from the sidebar. The destination drive for the restore procedure will be the volume you choose.
From the Edit menu of Disk Utility, choose Restore.
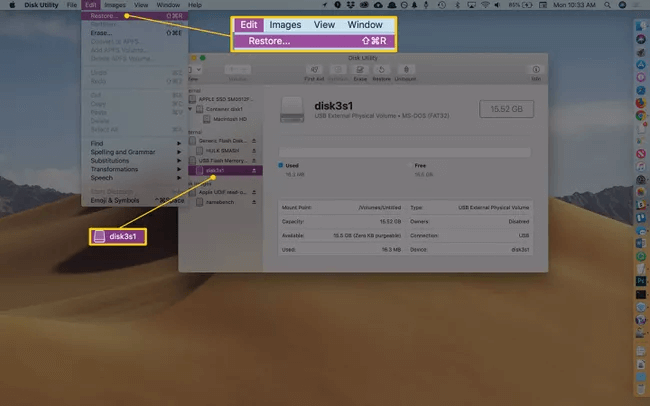
The source device to utilize for the Restore procedure must be chosen from a drop-down selection on a sheet that will automatically appear. The page will also let you know that the destination volume you choose will be wiped, and its contents will be replaced with data from the source volume.
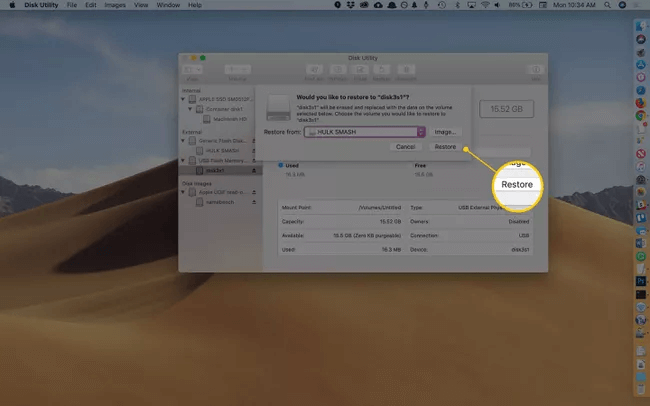
Select a source volume by using the drop-down menu next to the words "Restore from" before clicking the Restore button.
The Restore procedure will now start. The progress indicator showing how far along in the Restore process you are will appear on a new drop-down sheet. By selecting the Show Details disclosure triangle, you can also view more specific information.
The Done button in the drop-down sheet will become active after the Restore procedure is finished. To exit the Restore sheet, click Done.
Using a Startup Drive to Restore
Both the destination and the source must be able to be unmounted to use the Restore function. If you wish to restore it, you can't have your starting drive running. Instead, you may boot the Mac from another drive that has a copy of the Mac OS on it. The one you use can be any volume connected to your Mac, including the Recovery HD volume, an external drive, or a USB flash drive.
Why Use the Restore Function in Disk Utility?
Every version of the Mac OS comes with the free Disk Utility. Even while the other cloning tools have a lot more functionality, using Disk Utility will still produce a completely workable clone if you don't have access to third-party apps, but it could take a few more steps and miss some great features like automation and scheduling.
Apple asserts that their Mac OS is perfectly prepared to support customers with everyday PC operations, and they appear to have established the same over time. It is essential to keep all of this information safe since Mac users save a lot of sensitive data on them.
Clone hard drive on Mac using disk cloning application
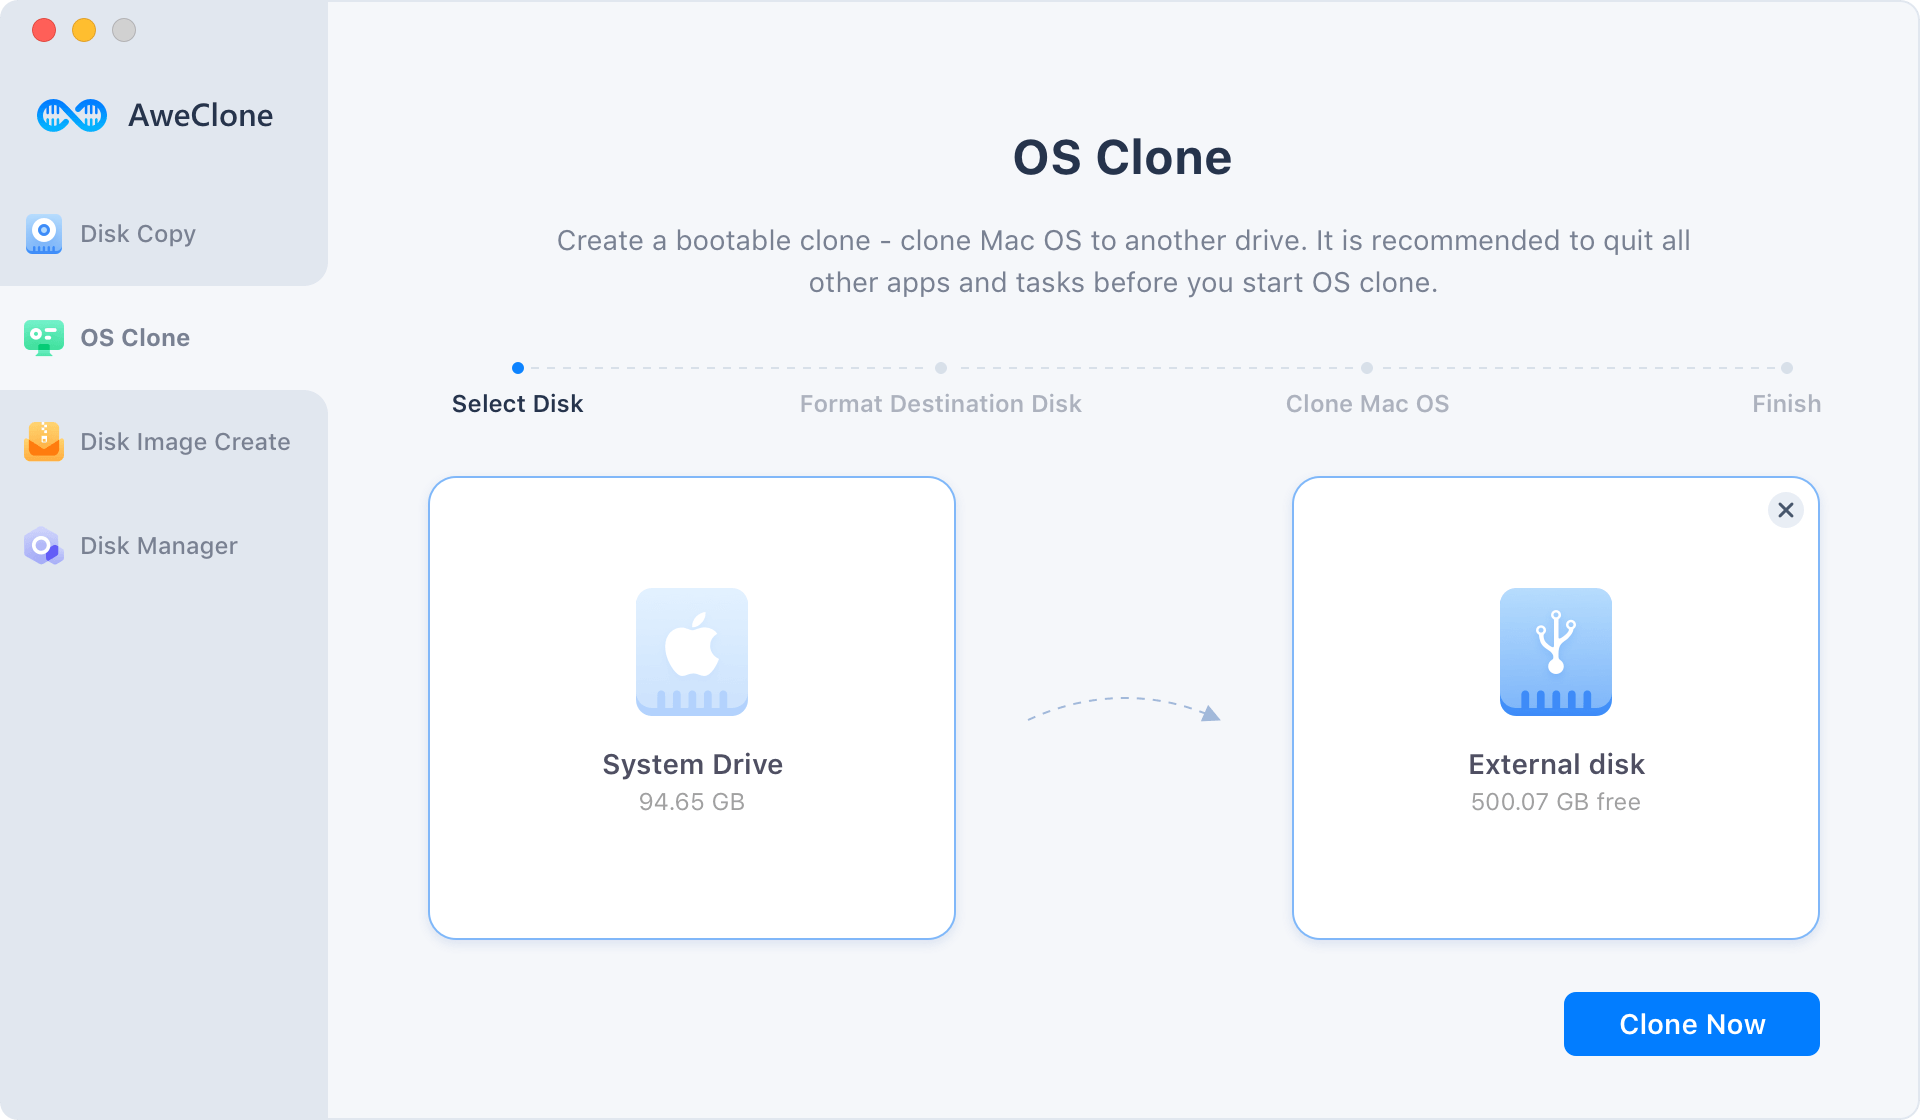
If you want a easier method to clone hard drive on Mac, just try third-party disk cloning application - such as AweClone for Mac. It can help you Mac users clone hard drive on Mac or create bootable clone backup on Mac.
AweClone for Mac
- Quickly clone HDD, SSD on Mac.
- Create image backup for Mac.
- Create bootable clone backup on Mac.


AweClone for Mac is pretty simple to use. For example, you just need to a few clicks to create a bootable clone backup for your Mac.
Connect an external hard drive to your Mac and select it as the destination drive > click on Clone Now button to clone Mac data to the external hard drive and make it be bootable.