How to Permanently Remove Excel Files on Mac?

updated on 2018-02-14 to Mac Data Erasure
I guess you're saving a project document file in Excel format. But now, when you don't need the file anymore, you want to destroy the file because you are going to lend your Mac to other person. Well, if that's an important file that anybody shouldn't see it, then you're on the right track. However, you might find it's hard to make sure the Excel file is permanently removed from your Mac. And FYI, deleting actually doesn't make the file removed from your Mac's hard drive.
In fact, deleting is just making the Excel file invisible on your hard drive, waiting to be overwritten with new files. So yes, it's possible to recover the file. Even for some people, it's walk in the park. Moreover, you may already know that there are a lot of data recovery programs that able to recover the deleted Excel files easily. It'll be another challenge for you who want to permanently remove Excel files on your Mac.
The right way to permanently delete Excel files on Mac
Fortunately, you have come to the right place. Here, you'll find how to permanently remove Excel files on Mac, and it's guaranteed that once the files are gone, it'll be gone forever. Nobody could recover the Excel files – including you.
All you need to do is just downloading a reliable data erasure tool to do this kind of task. There are many Data Erasure software programs out there, but among all of them, the most reliable software which is recommended for Mac user is AweEraser for Mac.
AweEraser for Mac has been trusted by thousands of Mac user to permanently remove their important files. More interestingly, it could be done within a few simple clicks. Yep, a few simple clicks of a mouse. So the first thing you have to do is download the software via the button below, and I'll show you how to permanently remove Excel files using this amazing software. Don't worry. It won't take more than 10 minutes to download AweEraser for Mac. And to install it on your Mac, it's very easy – even kids can do it by themselves.


Once you downloaded and installed AweEraser for Mac on your computer, let's get started with the simple guide to permanently remove Excel files on Mac.
3 modes to permanently remove Excel files on Mac
AweEraser for Mac offers you three modes to permanently remove Excel files on Mac. We'll cover it one by one. Let's get started with the first one.
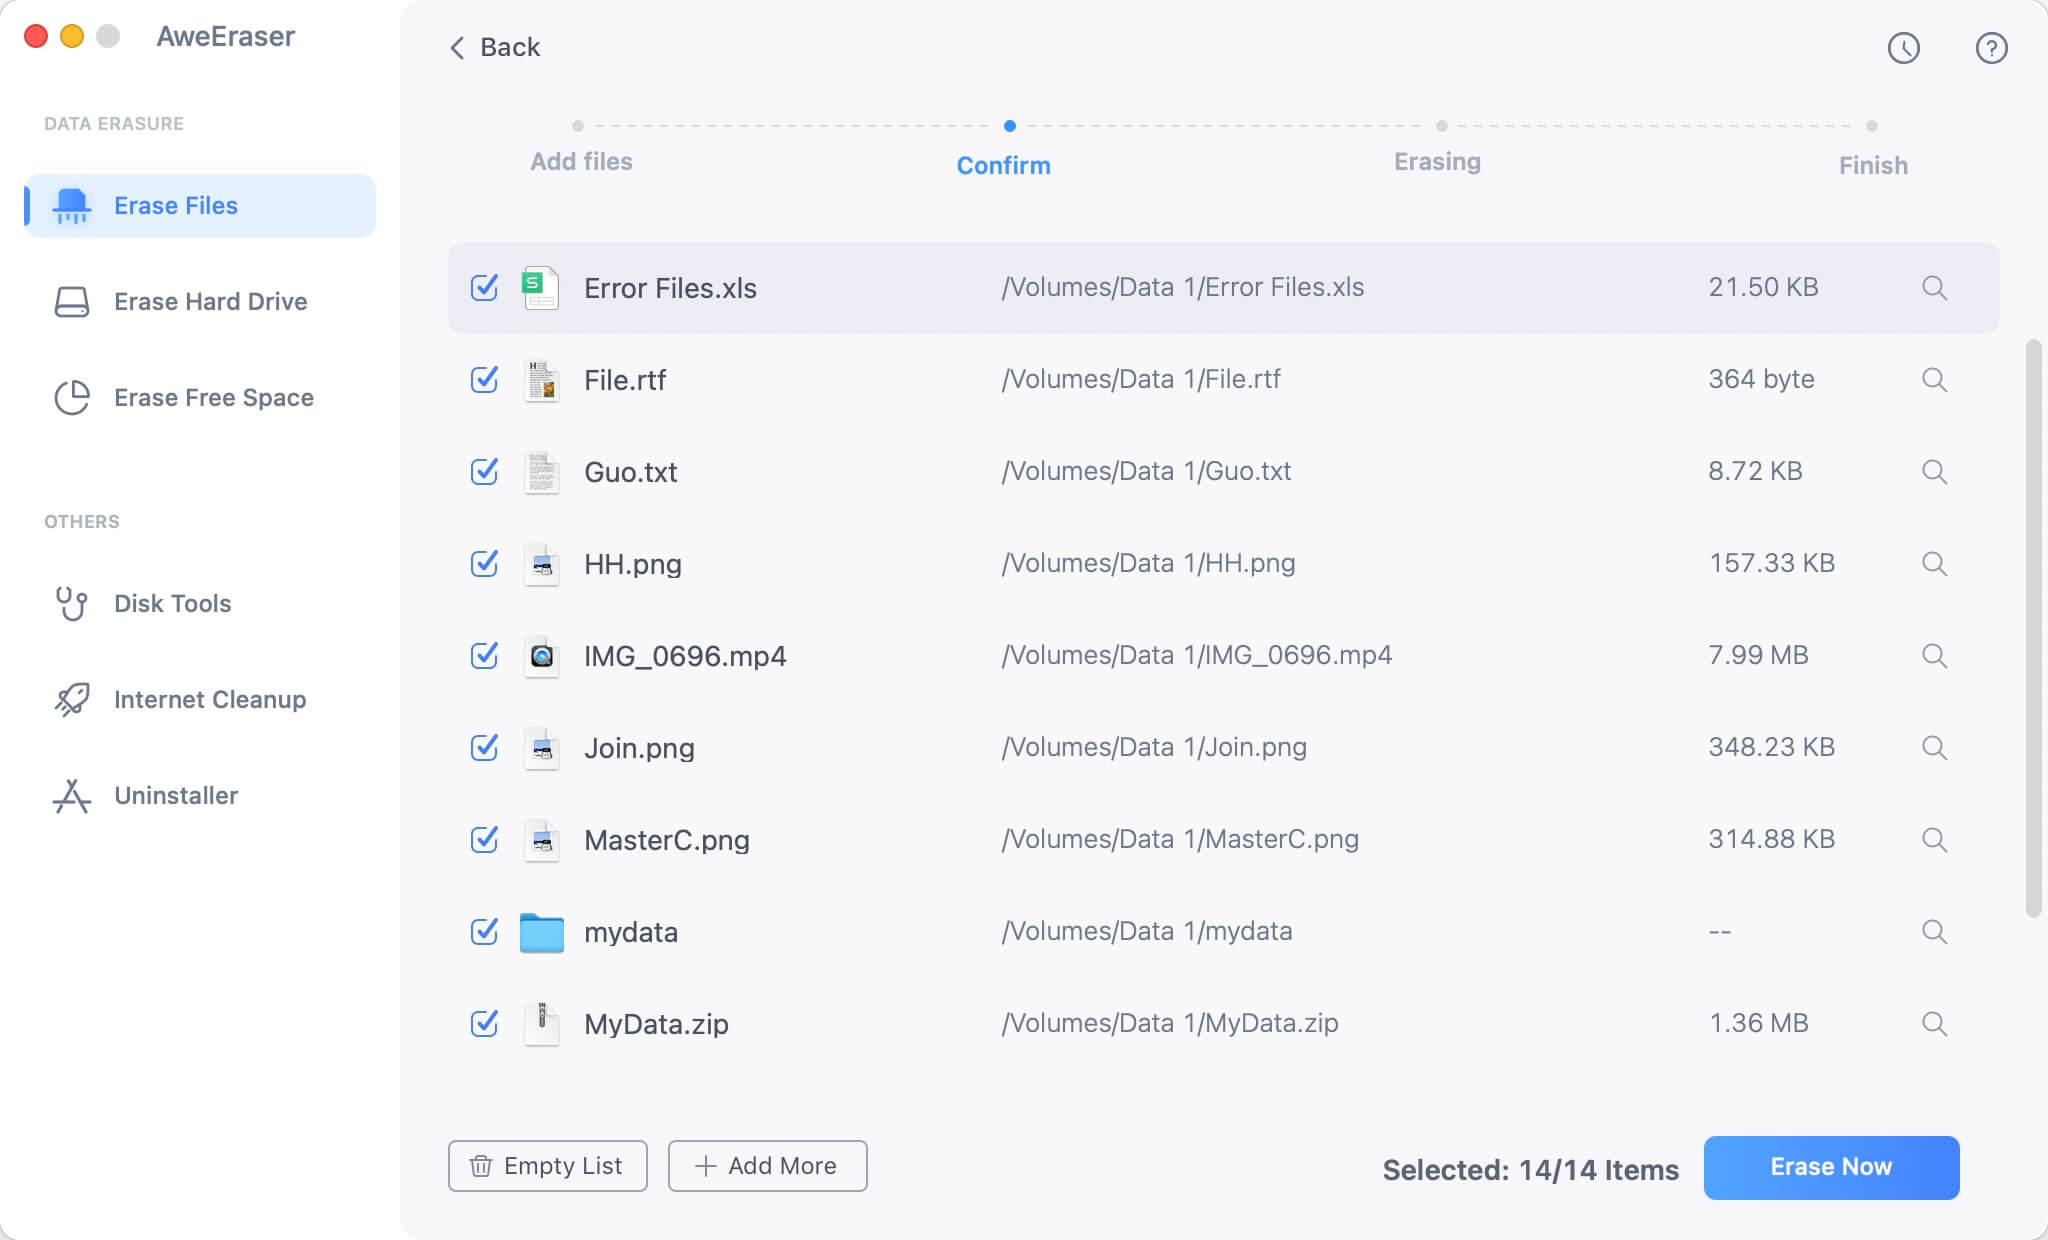
Mode 1: Permanently delete Excel files on Mac
The first mode allows you to select the Excel files or folders you want to delete permanently and add the files to the erasure list. So all you need to do is just select the files or folders you want to remove permanently and then click "Erase" button to start the erasing process. After the process is done, all the Excel files you want to destroy have been gone forever – guaranteed.
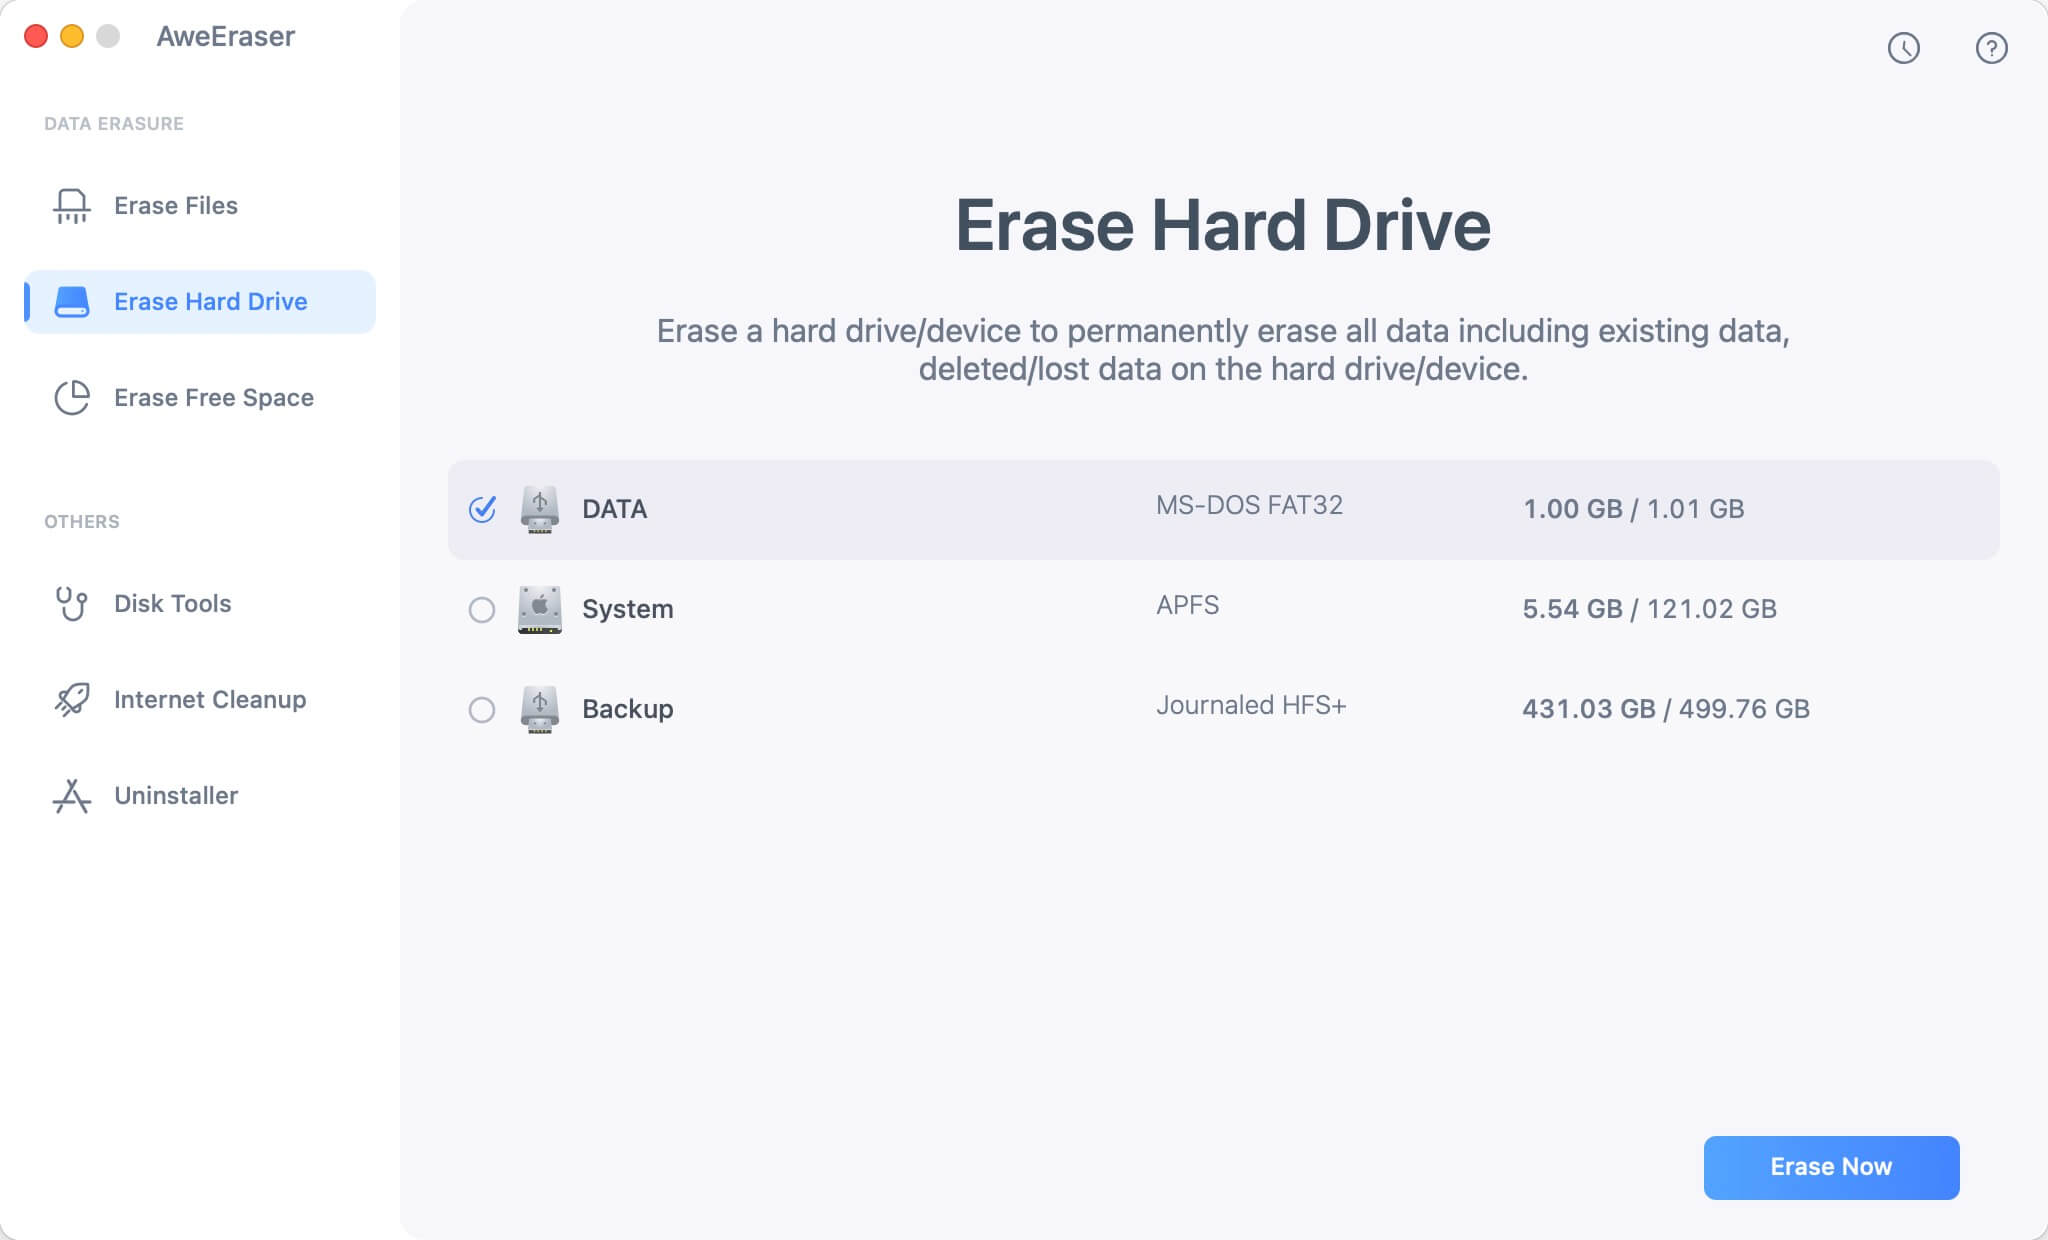
Mode 2: Wipe all Excel files on a single storage device.
If you save all the Excel files on a single storage device like a flash disk, you can use this method to make it easier for you. Just click on the storage device, click on the "Erase" button, and boom! All the files are gone out of existence.
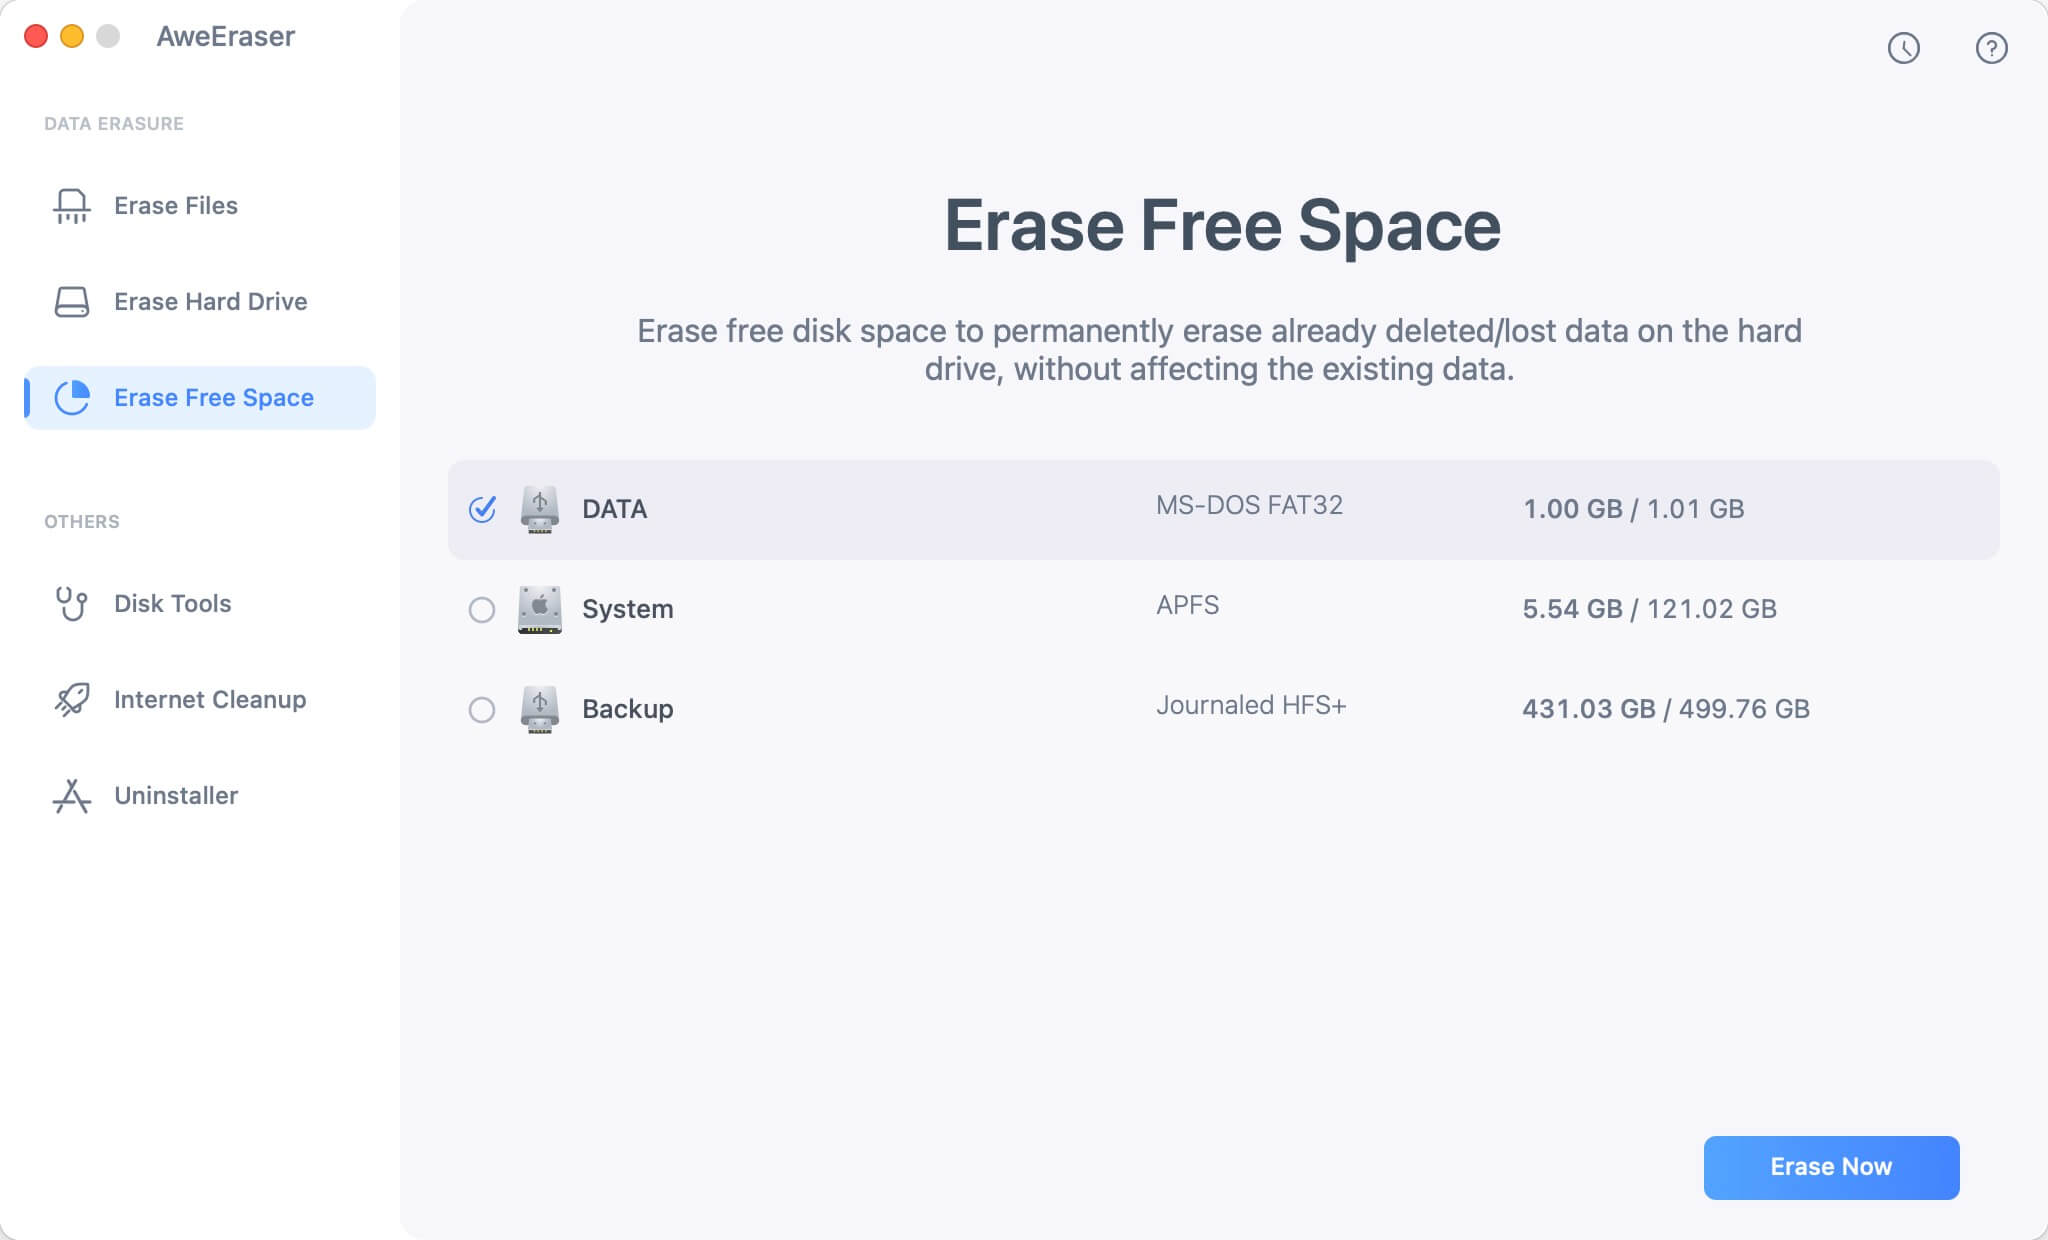
Mode 3: Erase all the deleted Excel files.
The last one is for you who already deleted Excel files but didn't sure whether it could be recovered or not. Simply choose where you save the deleted Excel files, and click "Erase" button. Don't worry, this mode won't erase the existing files on the same hard drive.
See? It's so easy to permanently erase files on Mac using AweEraser for Mac. Just choose which mode you need, and erase the Excel files on Mac within a few clicks of your mouse.