Easy steps to recover deleted, formatted and lost data from local disk and external device.
Free TrialFix Can’t Connect to This Network Issue

updated on 2022-08-26 to System Optimization
One of the problems you could run into while attempting to connect your Windows computer to a network is "Windows 10 can't connect to this network." As you can see, the error doesn't provide much information regarding the cause of the problem or what you can do to fix it, except to inform you that you can't connect to the network.
If this is the first time you've encountered the problem, you probably don't know what to do. Fortunately, you can use a few workarounds to connect your PC to your chosen network successfully.
This tutorial will cover all methods for resolving network issues, including the specific fixes for widespread problems and detailed instructions for troubleshooting certain issues.
Why is my laptop showing I Can't connect to this network?
There are several reasons for this problem, but your adapter settings are the most frequent. This problem can happen if your PC isn't connected to the Internet.
Windows could occasionally fail to locate the WiFi network, which usually results from an issue with your adapter, so you should check it.
Many people have complained that their HP laptop won't connect to WiFi; if this is the point for you, you should update your drivers.
1. Forget Network & Join Again
Forgetting the network and rejoining your WiFi or Ethernet network by inputting the password is the simplest solution to this issue.
1. Click Wi-Fi in the left-pane under Settings > Network & Internet. Select the Manage Known Networks option on the right pane.
2. Select your WiFi network and press the Forget button on the following screen.
3. Select your network and click Connect by clicking the Network Icon in the Taskbar.
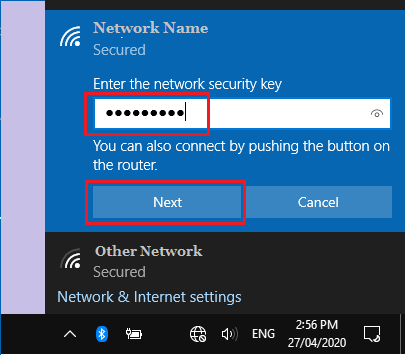
4. Click the Next button after entering your WiFi network password.
2. Run Network Troubleshooter
Windows 10 has a built-in network troubleshooter that is reliable for resolving various network connectivity issues.
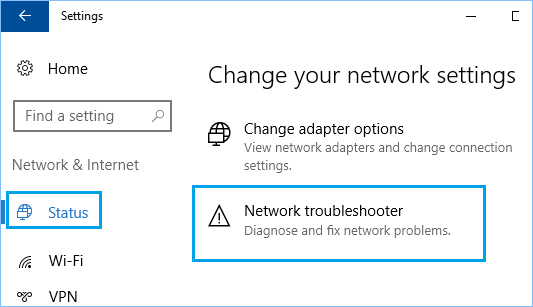
1. Click Status in the left-pane under Settings > Network & Internet. Scroll down and select the Network Troubleshooter option in the right pane.
2. Allow Windows to identify and resolve any connectivity issues on your machine.
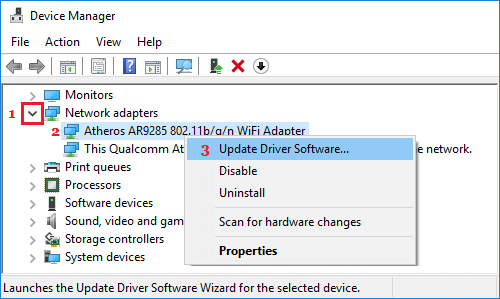
3. Update your drivers
A device's drivers make or ruin it. This error will likely occur if your network drivers are old or missing. Fortunately, updating your drivers manually or automatically is simple. Choose your preferred strategy and carry out the actions listed below.
1. You can use a function in Windows Update to automatically update out-of-date drivers. Using this, you may rapidly locate and update some of your drivers without checking each separately for updates.
2. Click the Windows icon in the bottom-left crossroad of your screen, then choose Settings to open the Start menu. Alternately, you can open the menu by pressing Windows + I.
3. Out of the drop-down selection, pick the Update & Security tile. You can find the majority of your Windows Update options here.
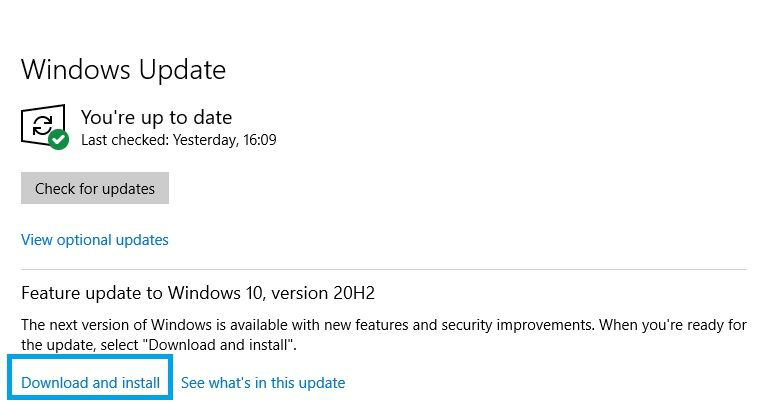
4. Go to the Windows Update area and, if it’s present, select the View optional updates link.
5. To find out which drivers require immediate updating, expand the Driver Updates section. Select the boxes next to the desired drivers to update drivers, then click the Download and Install option.
6. Before restarting your computer, let Windows download and update your outdated drivers.
4. Disable IPv6
Disabling IPv6 has been known to assist in resolving network connectivity issues on some PCs.
1. Navigate to Settings > Network and Internet > scroll down and select Network and Sharing Center in the right-pane.
2. Click on your Current Network in the Network and Sharing Center.
3. Select the Properties button on the following screen.
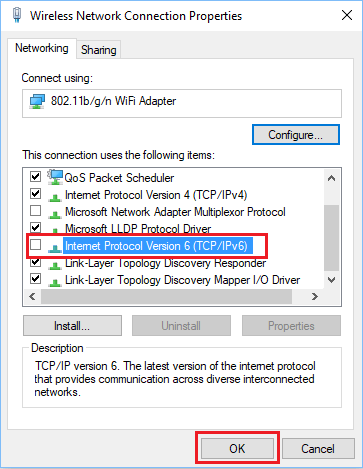
4. Uncheck the box next to Internet Protocol Version 6 (TCP/IPv6) on the Network Properties page, then click OK to save the setting.
5. Restart your computer to apply the modification after disabling IPv6.
5. Reset your network settings
You might be able to restore your internet connection using the Network reset tool. All current profiles for the networks to which your computer is linked are removed. Your machine will restart with the factory default settings.
Once you've finished the steps below, remember that you'll need to re-authorize all of the networks you previously used.
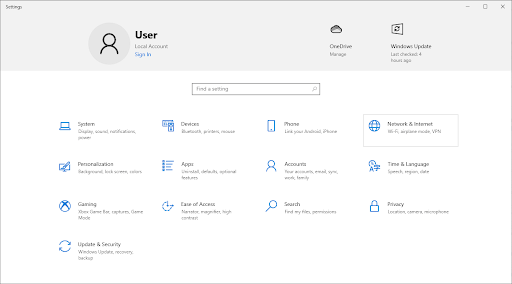
1. To open the Start menu, click the Windows icon in the lower-left corner of your screen. Alternatively, press Windows + I to access Settings.
2. The Network & Internet tile should be clicked.
3. Stay on the Status tab at all times. Click the Network reset link at the bottom of the page by scrolling down.
4. Read the warnings before starting the network reset procedure. Once you know what this feature accomplishes, click the Reset now option.
5. Select Yes. Check to see if you can access the internet once you’ve reset all of your network profiles.
6. Turn Airplane Mode On And Off
Sometimes the only way to fix connectivity problems that are not immediately evident is to detach your desktop or laptop. We can easily enable and then disable Airplane Mode for this.
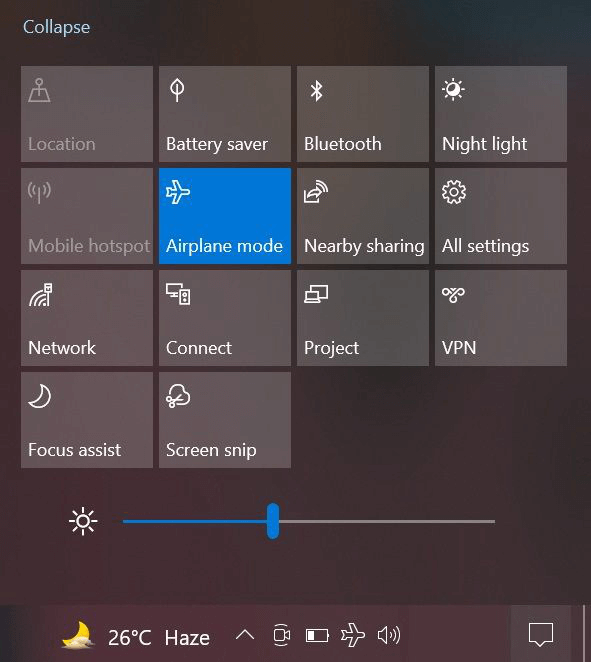
The Windows Action Center button should be clicked (the dialogue box icon at the bottom-right of the taskbar).
To activate it, choose “Expand” and select “Flight mode” or “Airplane mode.”
To turn off Airplane Mode, press the same button once more after a short while.
7. Install Windows Updates
As previously indicated, this network issue could be caused by software defects. Fortunately, Microsoft upgrades Windows frequently to fix these flaws and other problems. Make sure you have the most contemporary version of Windows Update installed. Here's how to go about it:
1. “Update & Security" can be found by opening "Settings."
2. To find the most recent software, click “Check for updates.”
3. To apply the update, click “Download and install.”
4. For the changes to take effect, restart your computer.
8. Restart your PC
Although this approach may appear overused for resolving issues with our gadgets, it works well for these network failures. After restarting the computer to clear up any corrupted caches, you can renew it. So, attempt a computer restart to see if it resolves the issue. Try the next option if that doesn't work.
Conclusion
You should be able to resolve the "Windows can't connect to this network" error on your computer using the suggestions provided in this article. It's also crucial to be aware that you might need to try more than one remedy before the issue can be resolved. You can go back to the solutions and test them once more to fix the problem if it might recur.
Hot Magoshare Products
Securely and permanently erase data before selling, donating or giving away PC and digital device.
Free Trial
Clone boot disk, external disk, USB flash drive, memory card and more on Windows PC.
Free Trial