Create Disk Image Backup On M2-Chip Mac

updated on 2022-07-28 to Mac Disk Clone
To build a disk image from a disk or a linked device, use the Disk Utility in macOS. A file called a disk image (.dmg file) has the appearance and functionality of a mountable device or volume.
Why should you worry about disk images?
Disk images can be made from your hard drive or a USB flash drive, although they are often copies of specific optical media. There are several benefits to adopting them, including the following, according to Faronics, a firm that "delivers software that helps manage, simplify, and protect multi-user computer settings."
You don't have to configure each computer separately or install the entire operating system from the start because you can duplicate one system to several identical machines. Multiple Macs can display the same image.
Since you can create as many distinct images as you desire, they are practical for incremental backups.
Files are created from images. You don't have to keep the actual hardware around if you only want or need to preserve the data from a Mac. Simply build and store an image of that drive.
Disk image creation on M2-Chip Mac
You may build a disk image that holds the information and empty space on a physical disk or attached device, such as a USB device, using the Mac's Disk Utility, which can be found in the Utility folder inside the Applications folder on your Mac's hard drive. The disk image will be 80 GB in size and contain both data and free space. For instance, if a USB device or volume is 80GB in size and contains 10GB of data. The disk image can then be restored to another volume.
This is how:
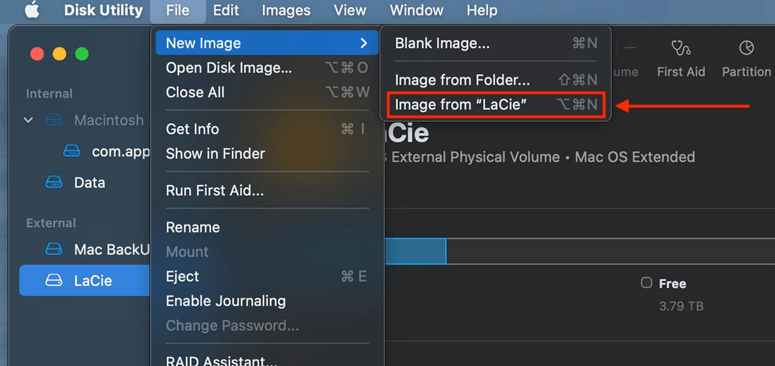
In the sidebar, choose a disk, volume, or attached device.
Select "Image from [device name]" under File > New Image.
Using a mac, create a fresh disk image.
Select a location for saving the disk image, give it a file name, and then optionally add tags. The disk image file is saved under this name in the Finder before being opened.
Select a choice from the Format pop-up menu by clicking it.
- Read-only: The disk image is easier to build and open and cannot be written to.
- Data is squeezed, resulting in a disk image that is smaller than the original data. There is a read-only disk image.
- After creating a disk image, you may add files to it using read/write access.
- DVD/CD master: Compatible with outside applications. Regardless of whether they are used or not, it contains a duplicate of every sector on the disk image. All data is precisely replicated when you make additional DVDs or CDs using a master disk image.
- Click the Encryption pop-up menu, then select an encryption option to encrypt the disk image.
- After selecting Save, click Done.
Disk Utility mounts its disk icon on your desktop and in the Finder sidebar and produces the disk image file where you placed it in the Finder.
Create secure disk image: techniques
For private data that you don't want anyone to see without your permission, you may also use the macOS Disk Utility to generate a secure disk image. Disk Utility's release:
To create a blank image, select File > New Image.
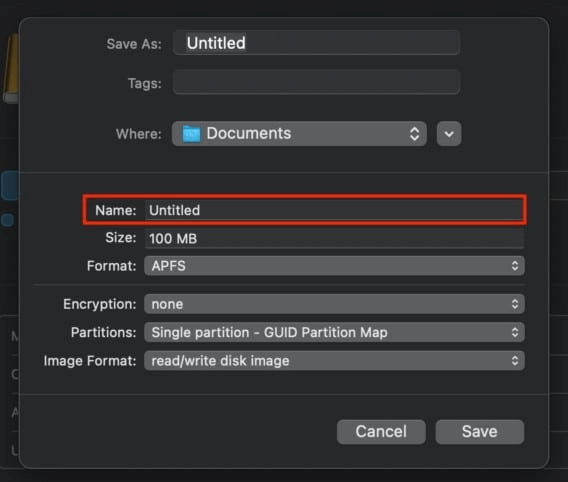
Select a location for saving the disk image, give it a file name, and then optionally add tags. The disk image file is saved under this name in the Finder before being opened.
Enter the disk image's name in the Name field. This is the name that shows up in the Finder sidebar and on your desktop.
Enter the disk image's size in the Size area.
Select the disk format by clicking the Format pop-up menu: Mac OS Extended or Mac OS Extended (Journaled) (Case-sensitive, Journaled).
Select an encryption option by clicking the Encryption pop-up menu.
To unlock the disk image, type (and repeat) a password. Then click Choose. Write down the password and keep it somewhere accessible. You can't open the disk image if you forget it.
For the remaining settings, stick with the defaults:
Select Single Partition - GUID Partition Map from the Partitions pop-up menu by clicking this link. "Read/write" disk image should be selected from the Image Format pop-up menu.
After selecting Save, click Done.
Disk Utility creates the disk image file in the same location as when you stored it in the Finder. On your desktop and in the Finder sidebar, it mounts its disk icon. The documents you want to protect should be copied from the Finder to the disk image.
Drag the original documents to the Trash and then select Finder > Empty Trash to delete them permanently.
Eject the disk image once you have finished utilizing the documents on it.
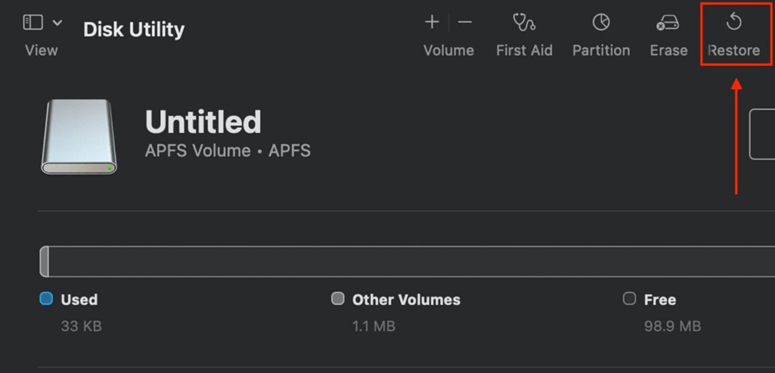
How to put a disk image back on a drive?
Additionally, you may restore a disk image to a disk using the Disk Utility. To restore a disk image to a disk using only one volume:
Choose the volume you wish to recover from the sidebar, then click the Restore button or go to Edit > Restore. This volume is the one that gets deleted and turned into a duplicate.
Select the volume you wish to copy by selecting it from the Restore pop-up menu. Click the Image button, then select the disk image you want to restore from.
Create M2 Mac disk image on M2-chip Mac
AweClone for Mac is a powerful disk cloning software which is able to securely and quickly clone hard drive or make backup on M2 chip Mac. If you want to make a disk image on M2 chip Mac, you can try AweClone for Mac.
AweClone for Mac
- Clone HDD, SSD and external device on M2 chip Mac.
- Create disk image of M2 Mac.
- Create bootable clone backup for M2 chip Mac.


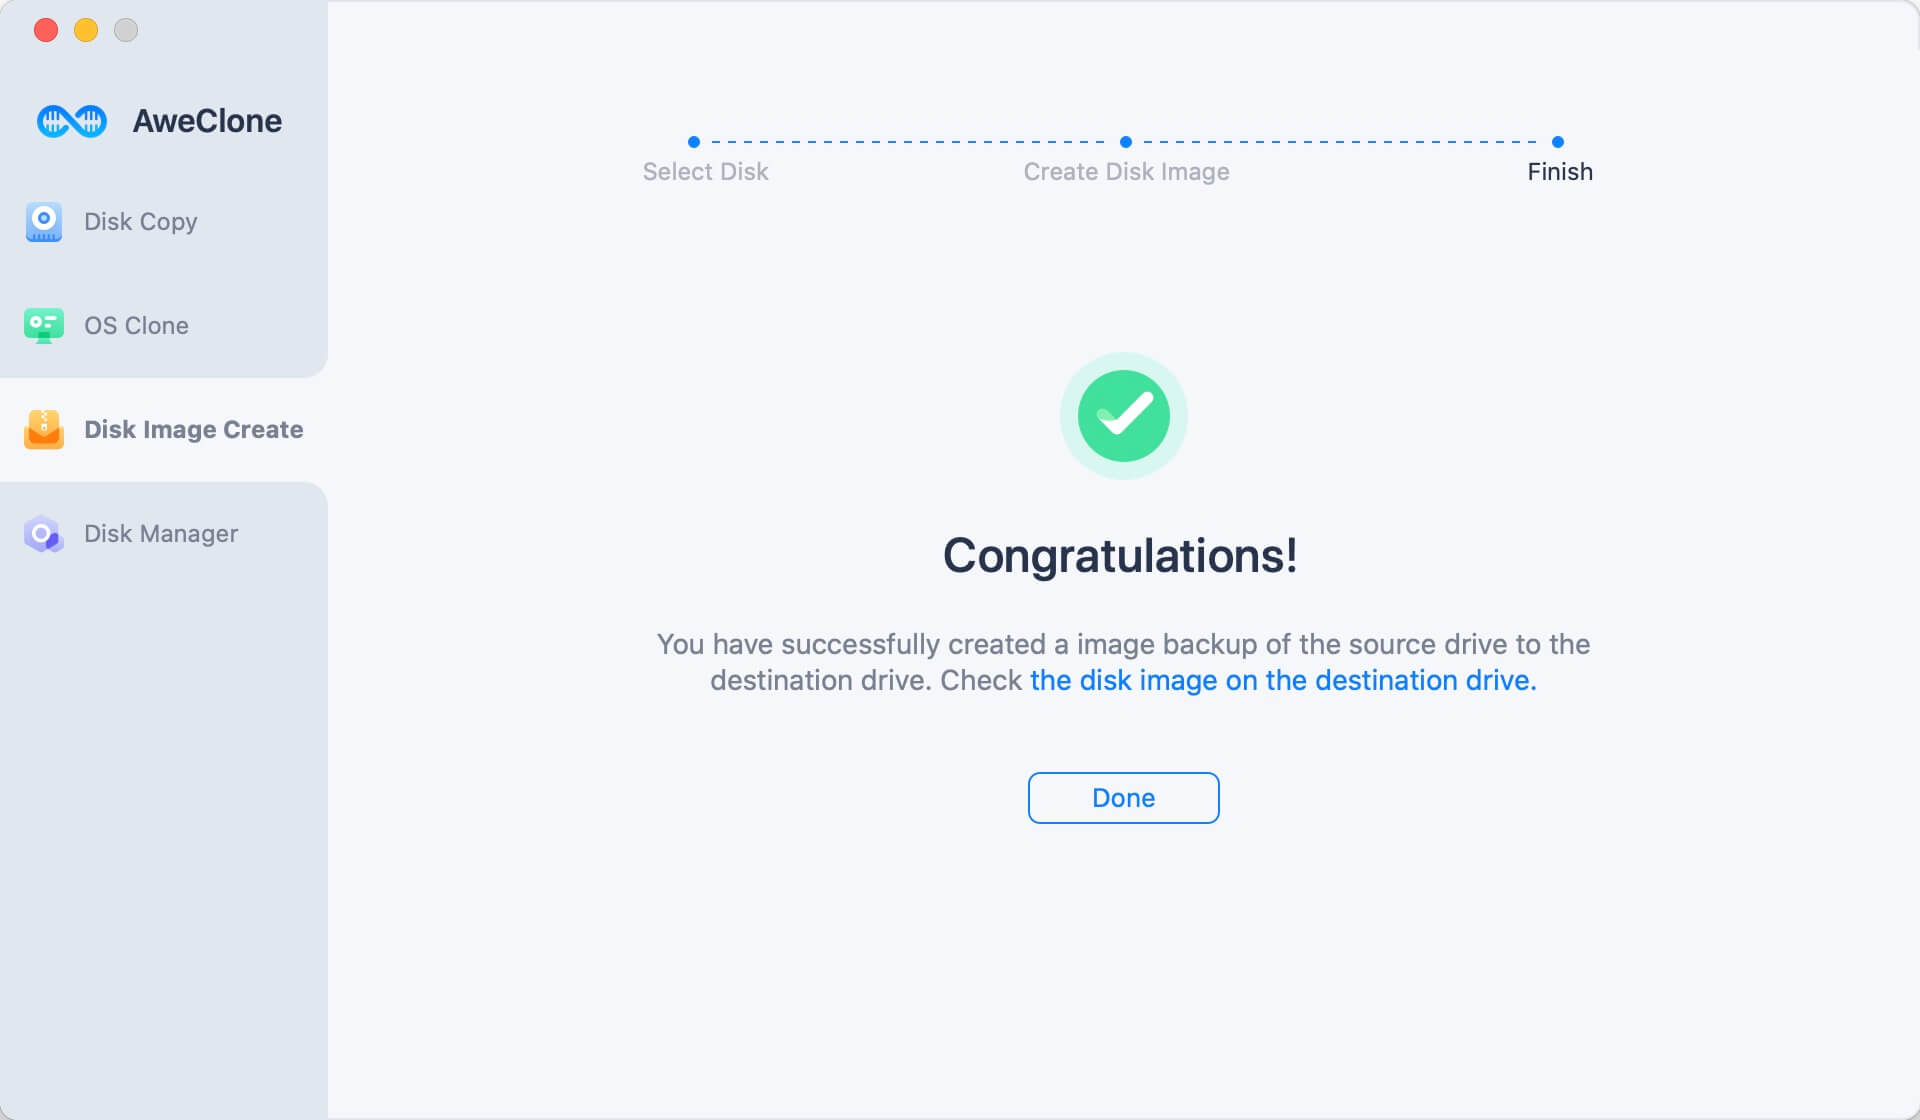
Step 1. Open AweClone for Mac, choose Disk Image Create mode and select the source drive and destination drive.

Step 2. Click on Create Now button to create a disk image of the source drive and save it to the destination drive.
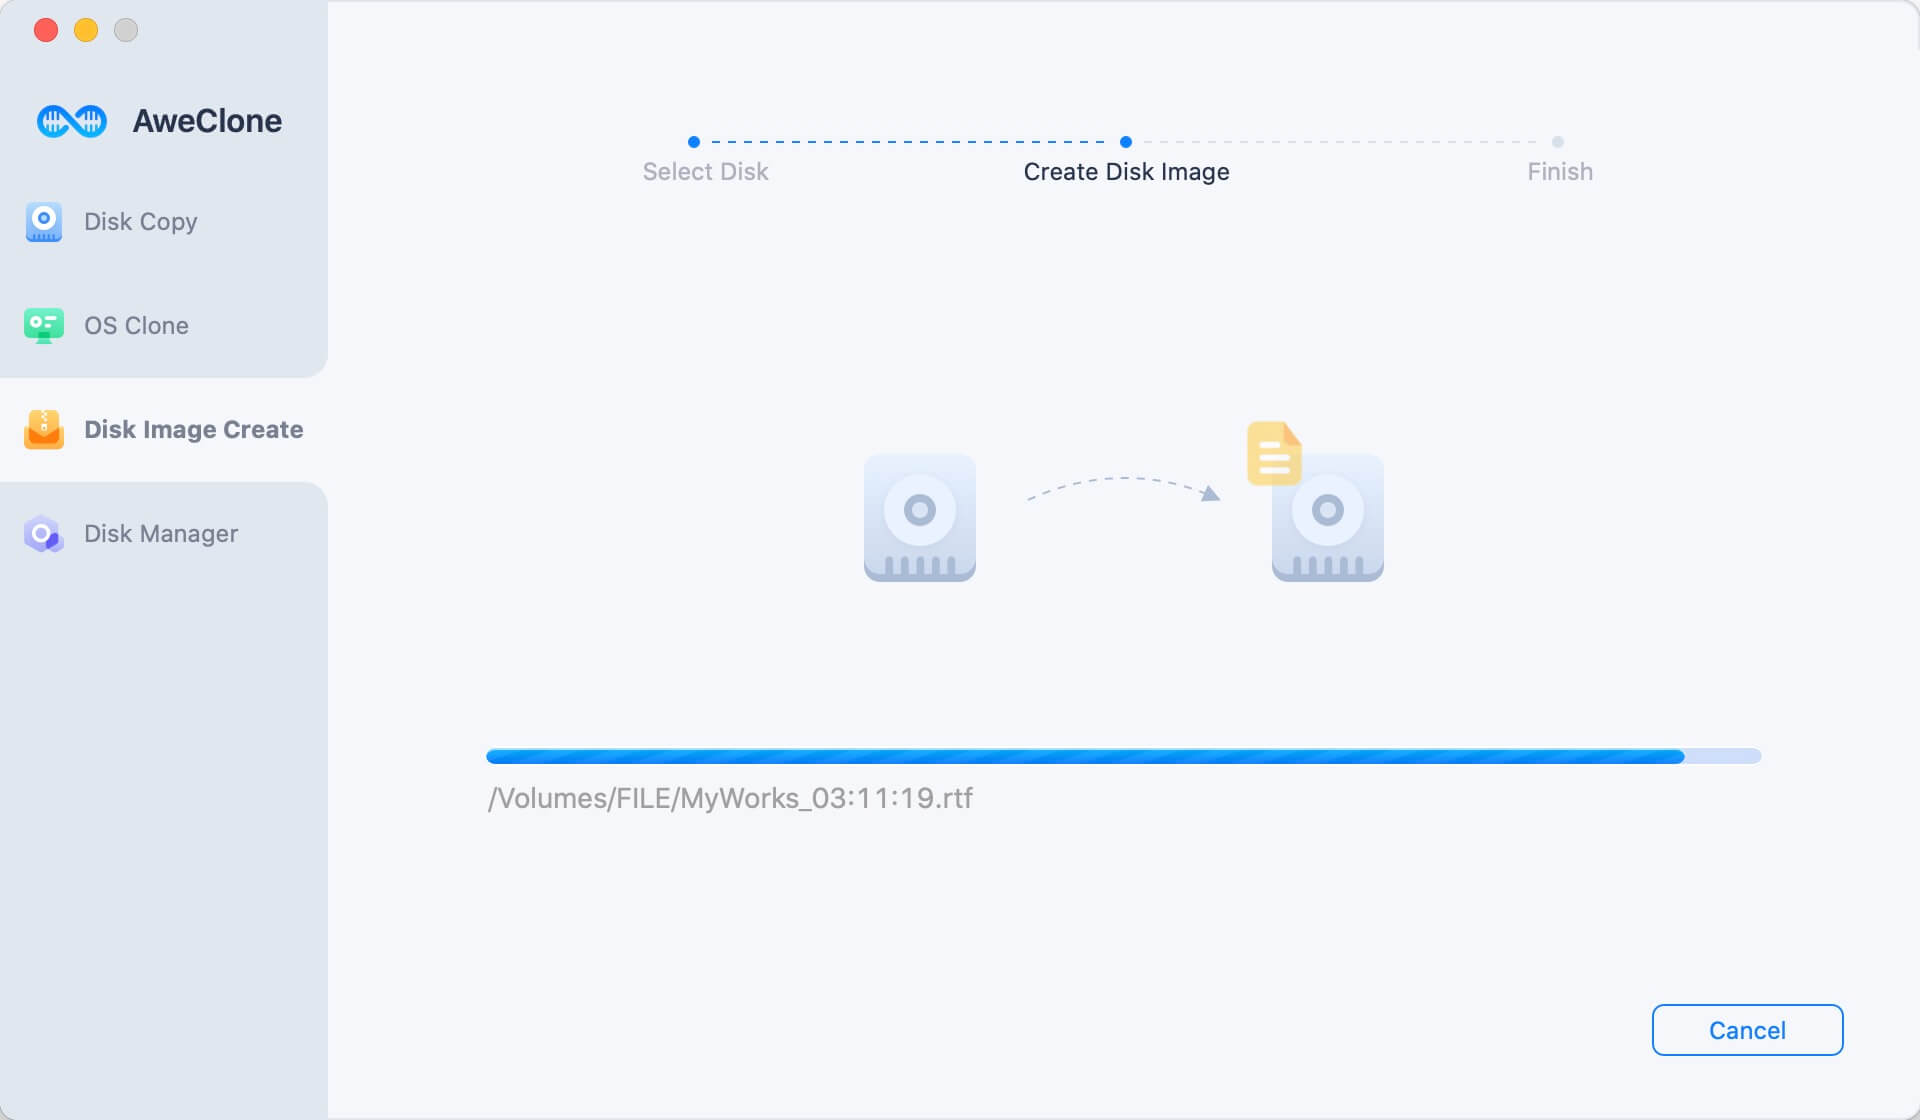
Once the process gets finished, you can check the disk image on the destination drive.