Time Machine Not Working on macOS Ventura

updated on April 25, 2023 to Mac Disk Clone
Quick Navigation:
- 1. Mac Time Machine problems, how to fix them
- 2. What if Time Machine fails to back up your data?
- 3. Clone Mac hard drive using Time Machine Alternative
When trying to back up their Mac with Time Machine after upgrading to macOS Ventura, some consumers have reported that the backup process begins successfully but suddenly halts a few minutes before it is finished. The most recent backup in Time Machine's preferences remains before the macOS Ventura upgrade.
Have you upgraded to macOS Ventura and encountered a similar issue on your Mac? It is a pressing matter, as Time Machine is an indispensable Mac feature. In the event of any problems, data loss is a real possibility. Use the advice and suggestions in this article to fix the issue.
Mac Time Machine problems, how to fix them
Fixing common issues:
- Verify that the external hard drive you use for backing up your Mac is firmly attached and turned on. Your Mac and the networked backup drive must be linked for the backup to work. Your backup disk might be unavailable due to network issues.
- Get the most recent version of Mac OS X and install it. Put the most recent software and firmware on your Time Capsule if you own one. Be sure to read the Apple Support article and update your Mac regularly. You should upgrade the AirPort base station's firmware.
- Only Macs running macOS Big Sur or later can restore backups made in macOS Monterey or later.
What if Time Machine fails to back up your data?
If the Time Machine needs fixing, here's a brief checklist you can use.
A. Reboot your Mac:
Restarting your Mac is the quickest way to fix the problems. It gets rid of old system files and fixes macOS's strange issues.
- Select Restart from the Apple menu.
- Uncheck the box labeled Reopen Windows when signing back in, and then click Restart when the "Are you sure you want to restart your Mac" message appears.
- After the computer has finished booting up again, launch Time Machine and begin backing up again.
Using an external hard drive with Mac Time Machine:
Time Machine won't function on your Mac running macOS Monterey if your external hard disk isn't properly formatted. It is what's causing Macs to have trouble with Time Machine. Most external hard drives use FAT or NTFS (Windows) file systems, but Time Machine does not support them. In addition, Mac's Time Machine cannot be used because it is not compatible with the APFS file system. Verify the following about the file system on your external hard drive:
- Join the computer's hard disk to your Mac.
- Launch Finder and select the required drive from the menu on the left.
- Right-clicking will bring up a menu; choose "Get Info" from there. If you want to insert an optional comment, press the Command + I keys.
- The kind of file system used by your hard drive will be displayed in the Backups Info box.
B: The Most Recent Updates to macOS
Having an out-of-date macOS version or installing it from a non-Apple source could contribute to your Time Machine issues.
To get the most recent version of macOS, please follow these steps:
1. To access the Apple menu.
2. Choose Software Update from the About This Mac menu.
In the newly launched window, look for available macOS updates. If any updates are available, selecting Upgrade Now will install them.

Turn on Time Machine again after restarting your Mac.
After you have deleted the file, restart your computer and enable Time Machine again. The data will be backed up again by Time Machine, and if the issue was caused by Time Machine not backing up, it should be fixed now.
If your Time Machine is still not backing up after attempting the following, the backup disk may malfunction. In this case, it's time for a replacement hard disk. You should be proactive and use data recovery software if you have some data on a backup disc. It's also not easy to get back a deleted Time Machine backup.
C: Restart Time Machine Backup
The backup process could be fixed by pausing it and then resuming it.
Below is what you need to do to get Time Machine backing up again:
- From the Apple menu, choose System Preferences.
- Pick the Time Machine option.
- Click the X to end the current Time Machine backup.
- Fourth, tap the "Back Up Now" button.
Clone Mac hard drive using Time Machine Alternative
If you can’t use Time Machine to back up your Mac, you can try third-party disk cloning application, such as AweClone for Mac. This powerful cloning tool can help you clone HDD, SSD and external device on Mac or make a bootable clone for your Mac startup disk.
AweClone for Mac
- Create bootable clone for Mac.
- Support for both Intel-based Macs and Apple Silicon Macs.
- Clone HDD, SSD, USB drive, digital device, etc.


Now, follow the steps below to make an exact bootable clone backup for your Mac without Time Machine:
Step 1. Download and install AweClone for Mac, then open it. Connect an external hard drive to your Mac.
Step 2. Select disk cloning mode - OS Clone. Select the external hard drive as the destination drive.
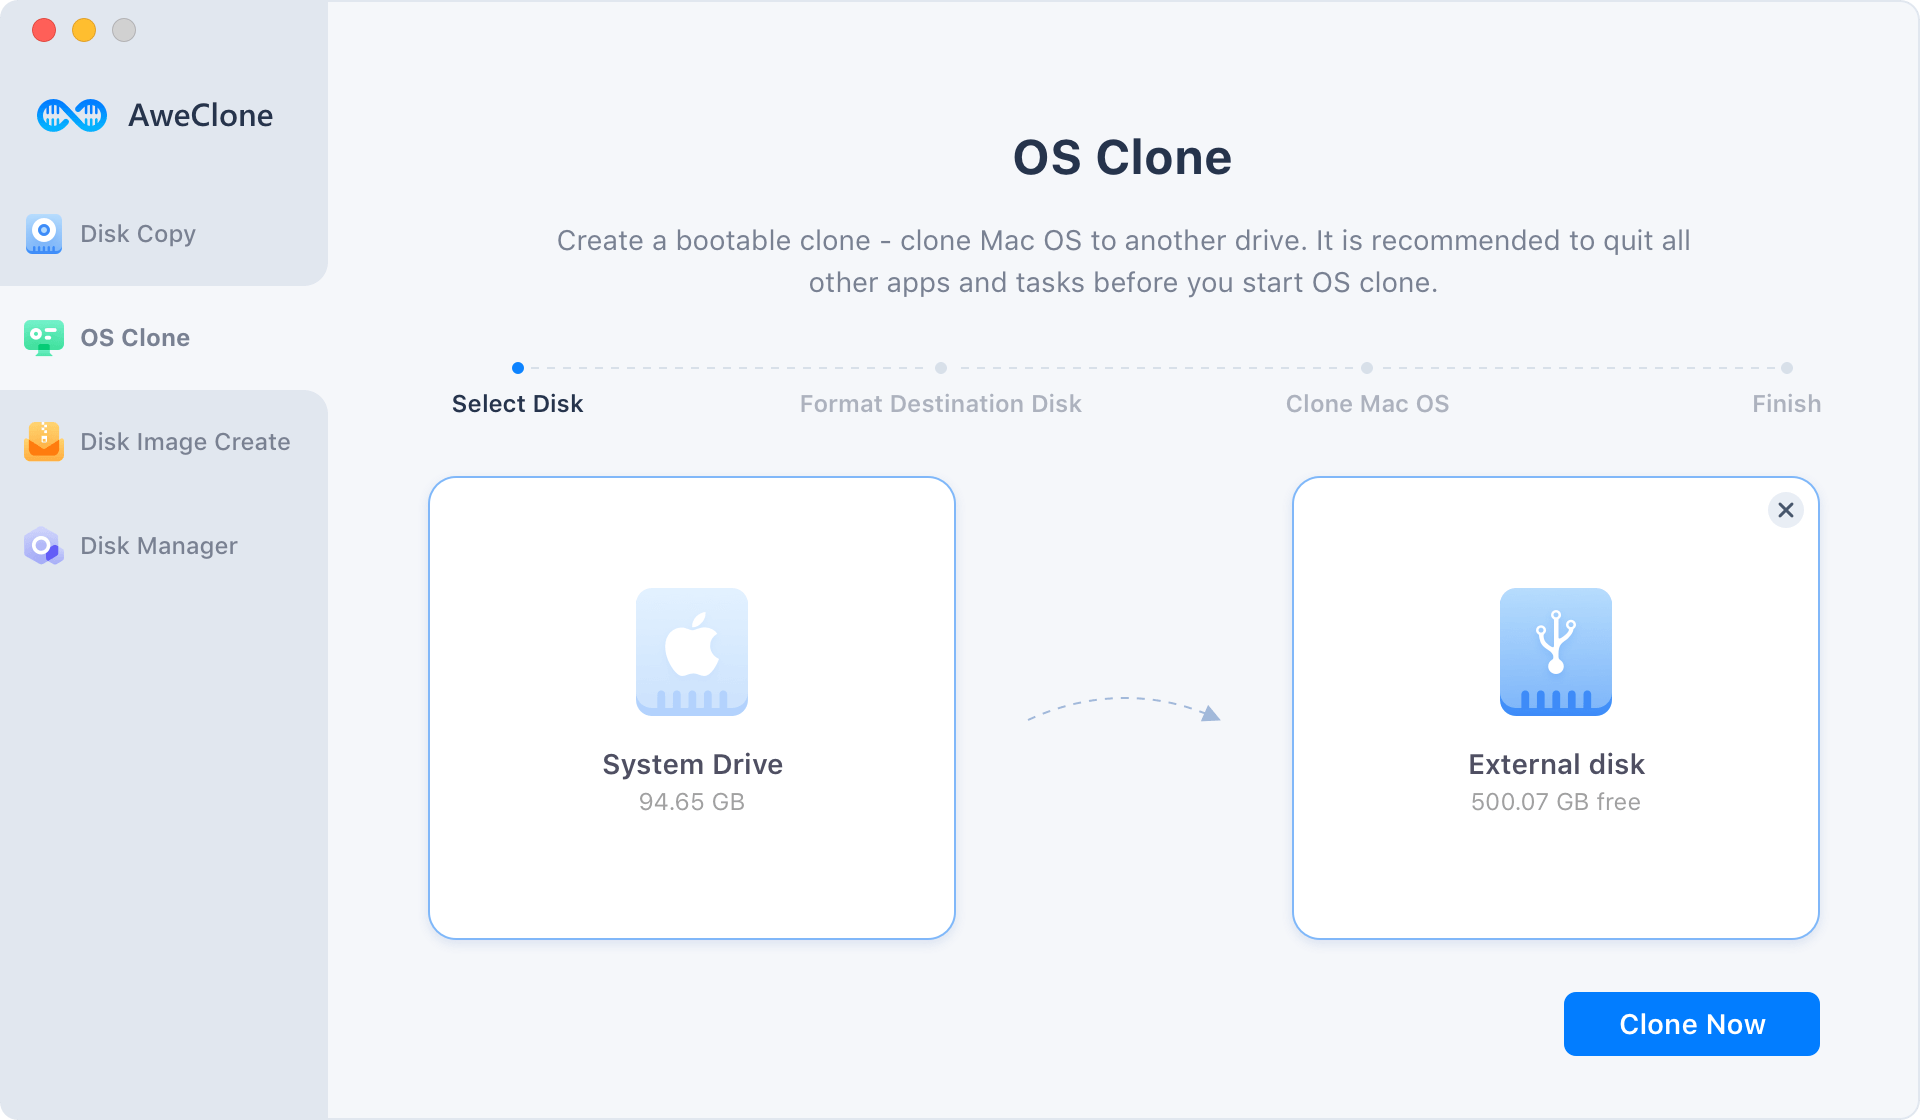
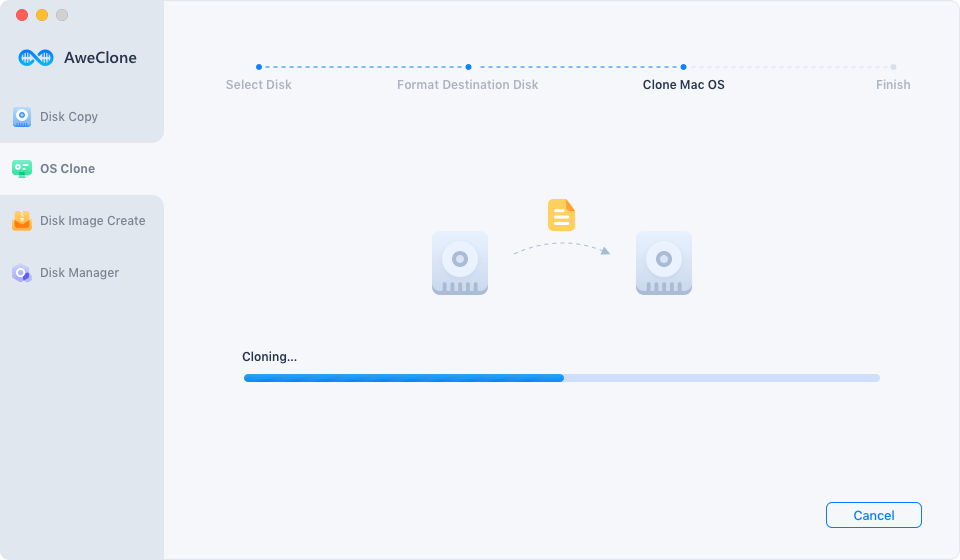
Step 3. Click on Clone Now button to securely clone all data from the Mac startup disk to the external hard drive.
Conclusion:
Resolving issues related to Time Machines is usually straightforward. With the help of this guide, you can quickly fix the issue and get Time Machine to back up your Mac properly again, even if you are experiencing file corruption. Don't worry; an alternative solution for recovering files on a Mac exists. You can install special restoring software to ensure that you can retrieve all your files successfully.